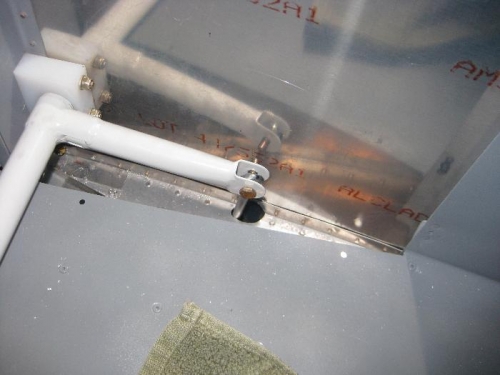
Installing the flap pushtubes requires modifying the fuselage. Vans has you drill / make an opening to allow the flap pushtubes move up and down. On the inside the top of the pushtube connects to the flap weldment and at the bottom, to the flap. The trick is to remove enough material from the fuselage to allow full travel, but not too much. There are no drawings to cover this installation, you just have to figure it out. I started by walking the flight line looking for one of the other RVs to see what they did. Lucky me, the first hangar I went to the builder was home. After crawling under his aircraft I came how with a couple of photos and a good idea of what needed to be completed.
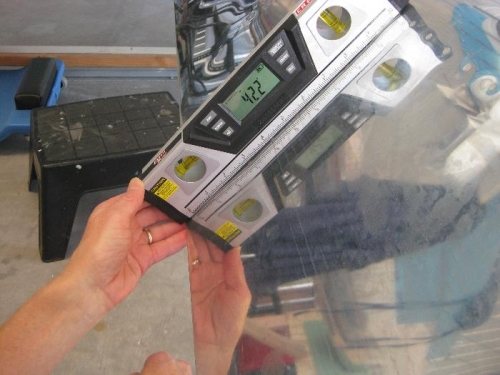
I drew a pattern on the side and bottom of the aircraft that was approximately what I needed. Next step was to drill out as much as I could, then switch to my dremel tool to cut / sand the rest of the opening. It took several iterations of sanding, reinstalling the pushtube, checking the flap movement and repeating. After several iterations I felt like I was close. Vans wants the flap movement to be 40 - 45 degrees. I placed my digital level on the flap and ask my wife to hold it. Using a spare battery I ran the flaps down until the pushtube made contact with the fuselage. The level went from 0 to 42.2 degrees. We are really close. Tomorrow I will sand this down just a little bit more. I want to get to 44 degrees, so just a little bit more to be removed. You can see in image one where the pushtube is just hitting the fuselage.