
|

|
|
|
Sid & Houston Mayeux Project
|
Date: 4-7-2012
|
Number of Hours: 3.00
|
Manual Reference: Sub-Panel
|
Brief Description: Pre-drilling avionics mounts, building up panel su
|
|
I moved on to finishing the forward upper fuselage. I removed the forward canopy frame, then riveted the structure in place. I picked final places for the avionics modules and drilled their attachment holes: 2x SkyView back-up batteries, SkyView transponder and engine monitor module, and the PS Electronics VHF transmitter module. All avionics are back in their boxes for storage--shouldn't come back out until the fuselage is just about finished.
As you may recall, I had removed the rear half of the two subpanel-to-panel structural ribs: I cut them flush where they emerge aft of the sub-panel. I then riveted an AA6-.063x3/4x3/4 rib to the ribs' forward ends so that I could rivet in new places to the rear face of the subpanel. Placement was guided by the holes in my new instrument panel. Those holes were placed at the Vans-spec height and spacing, but displaced inward to accomodate the SkyView screens. The ribs aligned perfectly with the panel's screw holes. Mounted in place, I marked rivet placement spots on the subpanel, matchdrilled using pre-drilled pilot holes on the new angle, then riveted in place.
Image 3 shows the final fit--perfect! That panel is now going into protective custody, and I'll use the stock Vans panel blank for canopy frame fitting.
|
|
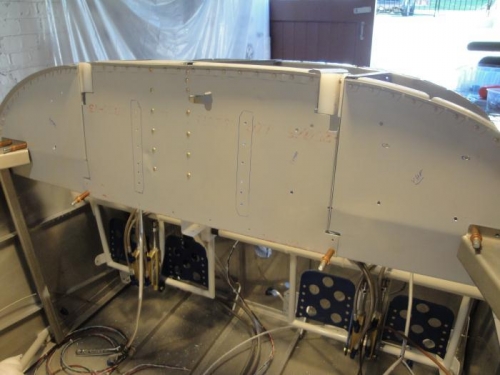
Avionics and Rib placements
|
|
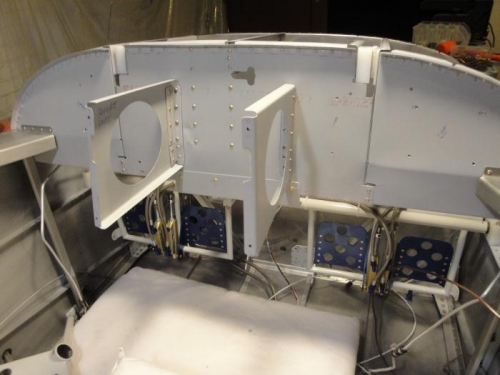
Subpanel and panel ribs riveted
|
|
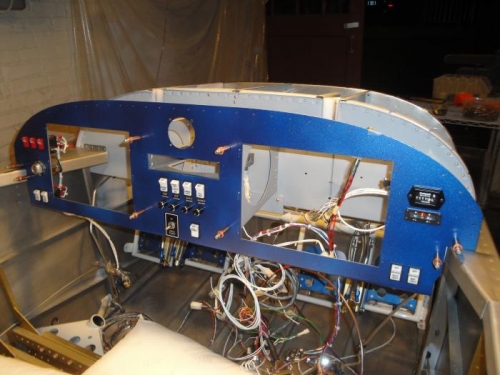
Panel fits like a glove!
|
|
|
|
|
|
|
|
|
Copyright © 2001-2024 Matronics. All Rights Reserved.
|