
|

|
|
|
Rob's REBVAIR Project
|
Date: 9-14-2019
|
Number of Hours: 4.00
|
Manual Reference:
|
Brief Description: pitot tube installation
|
|
As previously reported, I ultimately decided against the MAM pitot tube and opted for this $32 very plain aluminum model from aircraft spruce. In image one you can see the pitot is rivetted to the inspection hole cover, with the round plate on the inside to streamline the installation. You'll also not a stiffening channel sandwiched between the pitot base and the cover. The channel is actually a bit longer than the inspection hole opening (see below).
Image 2 shows how it looks installed. To install, you slide the cover forward with the channel on the inside of the inspection hole flange. Sliding it forward allows the rear part of the channel to clear the hole, and the assembly sits flush with the wing skin. Then you slide the assembly back until the cover mates with the inspection opening, Doing so engages the channel under the rear inspection hole flange. The whole thing is ridiculously stiff. Four 8-32 stainless screws complete the installation.
I put a lot of thought into the decision to go with such a rudimentary pitot tube. Firstly, the GRT EFIS does not rely on air data for integrity, so a failure (or icing over) does not severly impact safety of flight, even in IFR. This also obviated the need for a heated pitot (and FYI a heated pitot is not on the required equipment list for flight into IMC).
Second, the GRT already has AOA based on internal gyro calculations, so an exterior AOA pitot was not really necessary. Measured (v. calculated) AOA is more accurate in turbulent air, but the calculated AOA ought to be plenty of info/warning for approaching the stall.
FInally, the location of the pitot lends itself to upgrades later, in case I change my mind (or if a new owner really wants something fancier). This would not have been easy if I had used the MAM pitot. A final plus was the price and the fact that it only weighs a few ounces.
There was even room left over to install the outside temperature probe. Wires are connected via D-sub pins for servicing/maintenance.
|
|
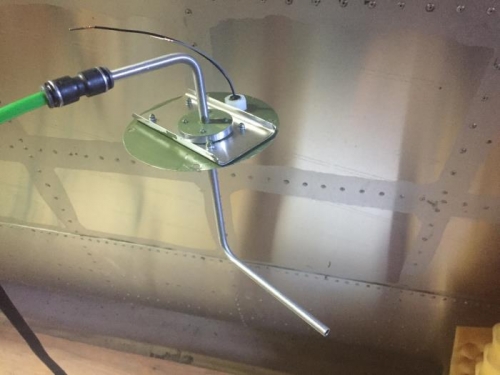
pitot tube construction
|
|
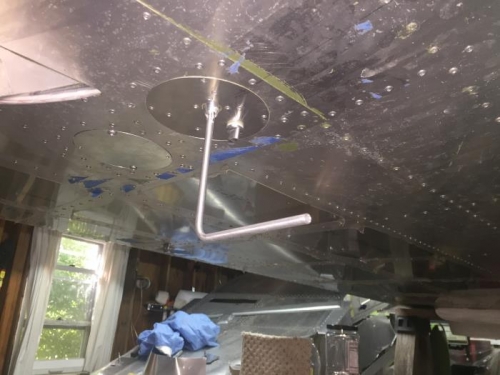
installed
|
|
|
|
|
|
|
|
|
Copyright © 2001-2024 Matronics. All Rights Reserved.
|