
|

|
|
|
Rob's REBVAIR Project
|
Date: 7-28-2013
|
Number of Hours: 10.00
|
Manual Reference:
|
Brief Description: Wing atach Woes (part 1 of 3)
|
|
I don't even know how to summarize the last few months of work on the wing attach process. I have experienced highs and lows....real lows...considering the difficulty in resolving oversize bolt-holes in fittings that would be incredibly difficult to replace. On the flip side, the four strut fitting-to-strut hole placements and alignment are equally challenging, given that the initial hole has to be transferred with reference to a line drawn on the fittings, while inside the strut. If this doesn't make sense, don't worry...it will once ou've familiarized yourself with this part of the manaul. Suffice it to say, there is a tremendous amount of precision required in the drilling of all these holes. But if I can share anything with builders that haven't done this yet, here's what I would do if I had to do it all again:
1) Temporarily attach the wings with one size smaller bolts (AN5), get the 1 degree dihedral, and measure and cut the struts. Then install the strut fittings (AN5 again), position the struts over those fittings, make sure all the edge distances are right, and clamp them in place. Then remove the struts (with fittings still clamped inside) and drill pilot holes as described in the manual.
2) Even with a drill press, holes drilled through the 1" thick material will wander to one side or the other. This can be minimized by not exerting too much pressure when drilling, but once drilled through, you have to reinsert the fitting into the strut, and drill the final hole through the back-side of the strut using the hole in the fitting as a guide.
|
|
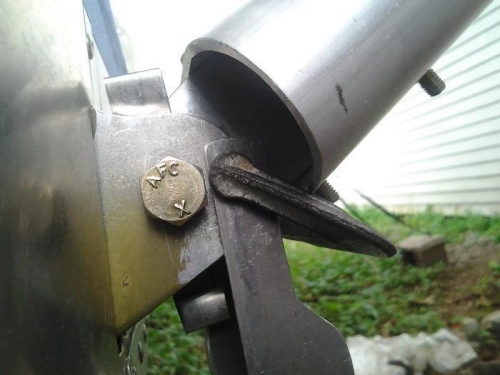
Shimmed and clamped
|
|
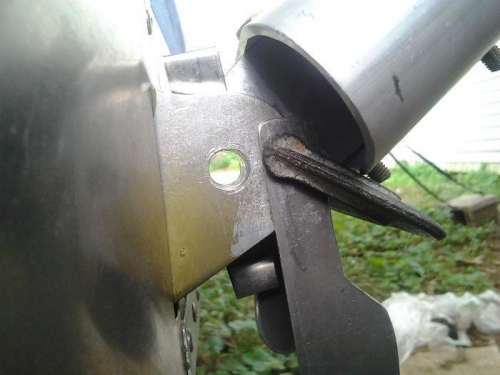
take out 0.3740" close tolerance bolt
|
|
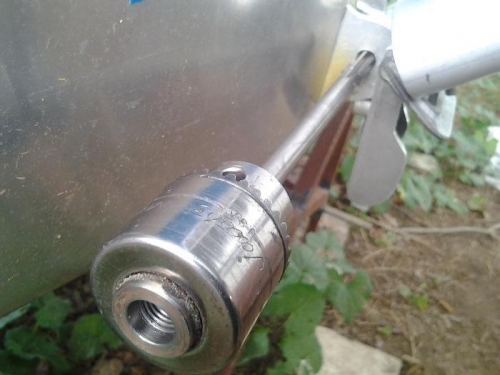
ream by hand with 'chuck grip'
|
|
|
|
|
|
|
|
|
Copyright © 2001-2024 Matronics. All Rights Reserved.
|