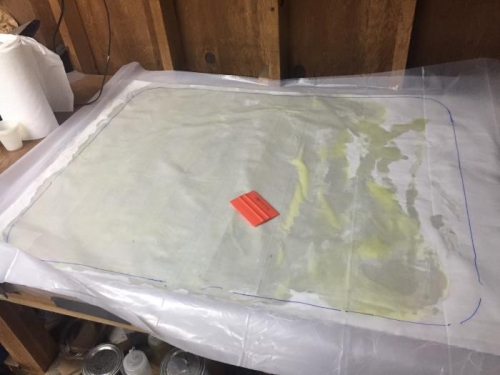
Image 1 shows the start of the wetting out process. On the left, you can see the translucent appearance of glass fully loaded with epoxy. You move the epoxy around under the plastic sheeting with the squeegee, so everything stays clean.
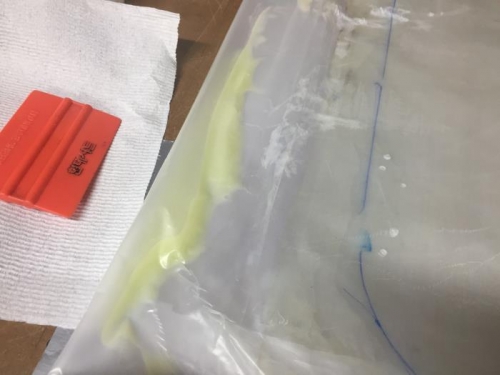
When the entire area defined by the blue outline of the part is wet, you start forcing the excess epoxy out to the sides (Image 2). This takes some muscle, so having 3 Mil (or greater) sheeting is critical to being able to take the abuse of the pressure you exert with the squeegee. It took at least 3 passes over the 'sandwich' to get all the excess epoxy out to the sides. I noticed that there's really no danger of squishing out too much epoxy...even with considerable downward pressure. You also start to get a sense of when there's no more epoxy left to push out, as the friction of the squeegee against the sandwich diminishes.
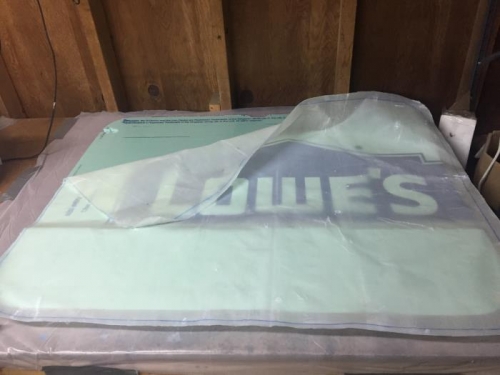
When I was satisfied that the epoxy/glass ratio was as good as it would be, I cut off all the edges around the blue line and the 'pre-preg' was ready for application (Image 3). All this time, there is no epoxy mess on the table etc...the plastic 'sandwich' keeps everything contained and a breeze to handle.