
|

|
|
|
Rob's REBVAIR Project
|
Date: 1-3-2009
|
Number of Hours: 6.00
|
Manual Reference: Chapter 12
|
Brief Description: Home made ground handling handles
|
|
Here's a classic time v. money endeavor. Most builders agree these handles are handy to move the rear of the plane around on the ground; avoids putting stress on the tailwheel attach points and the empennage. Murphy aircraft wanted $260 US dollars for this relatively simple piece of fabricated aluminum. Granted, this price probably includes design time and investment, but still....$260! Just didn't make sense to me. There are a number of guys who have very simple to very sophisticated devices here. I wanted light weight, easy access (maintenance), and fail safe. After much thought, I came up with the following adaptation:
I built a plywood jig that would hold the two doublers (0.050") at the correct angle (and correct distance) for the fuselage attach. 6061 T6 material costs were $10 for the 1" sleeve (2' length), $10 for the handle (2' length), and $15 for the 0.050" plate. Cut out everything just so, clecoed to the jig, and brought it to the local Al welder. $35 welding job gave a nice sturdy interior sleeve.
Next I cut the slots in the sleeve for the "kayak pop pins" that were installed on the handles (Image 1). Others have used screws here, but I liked the simplicity of the pins. The pins prevent the handles from coming out inadvertently but controls the movement of the handles in and out of the sleeve. Note the "hook" towards the center of the sleeve. This allows one to lock the handles in place with a spring-loaded system. If the lock fails, the handles will still be there when I land...thanks to the pins. Ace hardware had louvre-door springs of varous sizes...this one was about 1.5" long, and the plastic mount it comes with provided a perfect place to rivet the spring in the center of the sleeve.
Image 2 shows the handle just before insertion. You can see the pop pin just needs to be depressed to allow insertion, and subsequent engagement in the grooves I created in the sleeve. Image 3 shows the handle in action...about 3.75" of tube sticks out for me to grab.
I was fortunate
|
|
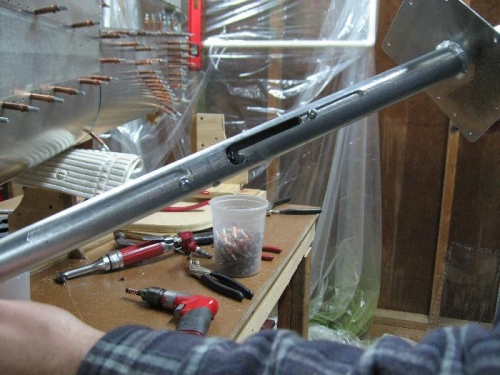
Handle "sleeve" with grooves for pins
|
|
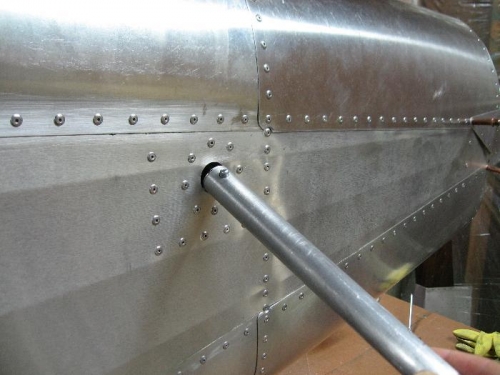
sleeve installed, with handle to be inserted.
|
|
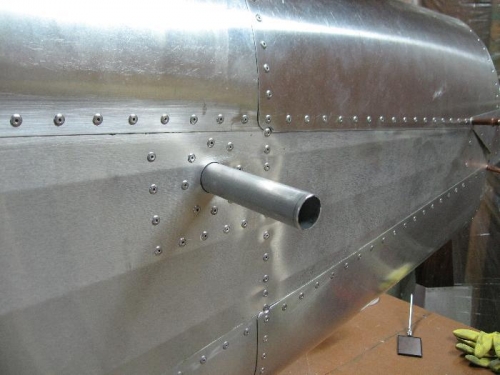
nice clean look
|
|
|
|
|
|
|
|
|
Copyright © 2001-2024 Matronics. All Rights Reserved.
|