
|

|
|
|
Rob's REBVAIR Project
|
Date: 8-10-2016
|
Number of Hours: 3.00
|
Manual Reference:
|
Brief Description: Windshield Install Part 5: retainer finishing
|
|
As always, it's challenging to take pictures of a flat white surface, but Image 1 shows the results of adding 'spakling' putty made up of 1/2 cabosil, 1/2 microballoons, and enough epoxy to make it slightly wetter than the first (really dry) filler. Then light sanding with 180 grit before the epoxy sets up completely (7 hours). You need to use your fingers to detect imperfections....visually it all looks very crappy. Vacuumed it dry and added a final light coat of pure epoxy, to give the surface extra durability.
Image 2 is after several coats of lime green arylic latex paint. I've had years to think about the color choices for this plane, and when I found out one could successfully use latex paint, it was a home-builders match made in heaven. The finish on the retainer is pretty good (in my opinon) for a first attempt on a piece that has so many compound curves. It's not perfection (often requiring hours of repeated sanding and filling) but enough to show I put in some effort. Most importantly, the finish is entirely befitting a bush plane that looks OK from 6 feet away, but looks outstanding flying along 1000ft above you. Keepin' it real.
Image 3 is what it should look like when I'm done. The gray areas are unpainted aluminum. I purposely didn't want to paint the belly for fear of kicking up rocks onto a hard-won paint job, Also looking to minimize unnecessary weight. I think the lime/white color combo and the flowing design are just enough to take the edge off the 'homebuilt look' of the aircraft.
|
|
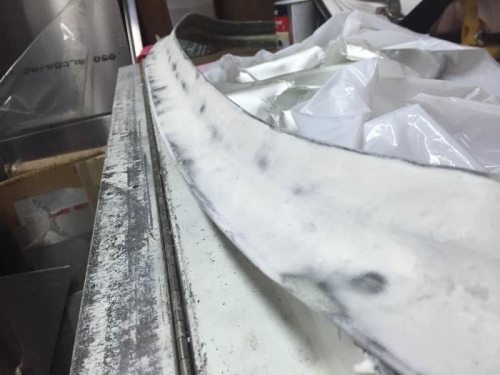
after sanding the last spakling
|
|
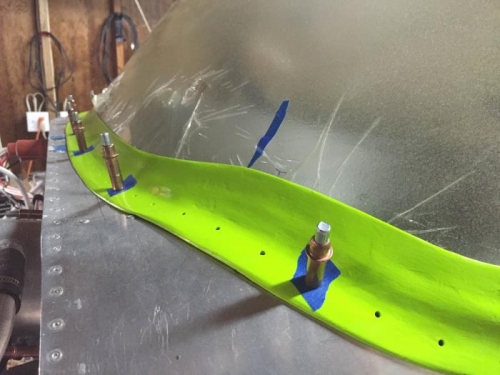
Lime green (Benjamin Moore)
|
|
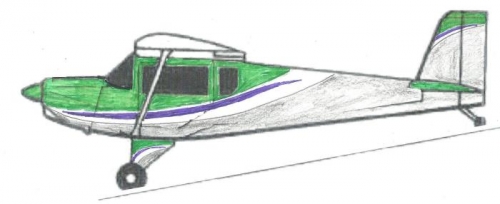
Planned paint scheme
|
|
|
|
|
|
|
|
|
Copyright © 2001-2024 Matronics. All Rights Reserved.
|