
|

|
|
|
Rob's REBVAIR Project
|
Date: 12-10-2014
|
Number of Hours: 5.00
|
Manual Reference:
|
Brief Description: Panel Part 5
|
|
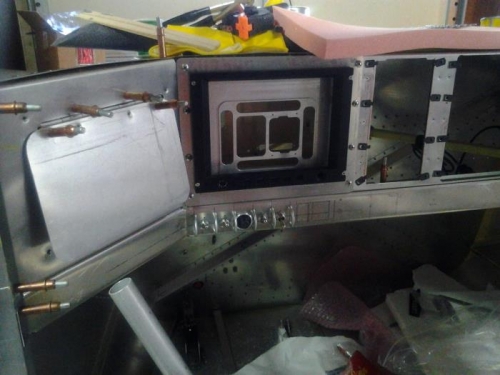
Hard to see here, but I've begun installing the toggle switches on the lower sub-panel. From left to right is the master, ignition, engine start, avionics master, and alt e-bus power switch. The order is derived form the normal star-up routine for the engine. Turn on the master, then power the ignition, start, then turn on the avionics. If you're a Nuckoll's follower, you'll know the avionics master swich is poopooed as a potential source of failure. Elsewhere in his writings however, he concedes that if you do want one, place it in series with the Schottky diode (which is what I've done). The avionics master is important to me because the GRT sport EFIS does not have an on/off switch, and would turn on with the master, and stay on while cranking the engine. The ADS-B "in" Navworx unit falls in the samwcategory. Secondly, I would prefer to leave all the other avionics set to their previous settings in between flights. With an avionics master, I'll never need to mess with things like nav radio and intercom volume levels. Turn on the engine, check oil pressure, hit the avionics master and I'm ready to communicate and start rolling down the taxiway in a few seconds. To the right of this bank of switches, the future elevator trim switch and indicator, and then the future autopilot power/engage switch. These were purposefully separated from the power management switch group to ensure they could be identified by feel. More switches to be added and a some better pictures. Stay tuned.
|
|
|
|
|
|
|
|
|
|
|
Copyright © 2001-2024 Matronics. All Rights Reserved.
|