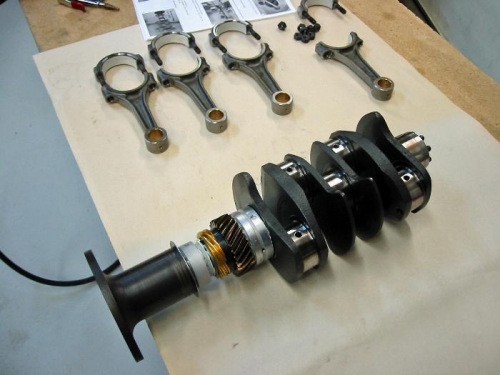
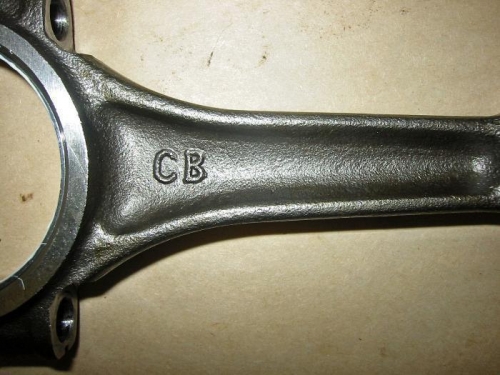
Per the manual, I put the crank in the freezer overnight, and heated the various gears and spacers to 450 degrees in the oven. In my first attempt, I got the first gear on fine, and then had a problem with the racer spacer. It locked on the crank only about 10% in place. I thought I would have to bring it to a shop and have it all pressed on but I was able to use a slide hammer puller to remove the racer spacer. (It only took a few light taps...if it took any more I would have quit.) On try number two I heated the oven to 500 degrees, and was quicker with placing the spacer. It went on fine the second time. All of the other heated parts went on without any issues.I started to assemble the connecting rods, but ran into a problem -- there are no "bumps" on the rods as mentioned in the manual for proper orientation on the crank. I'll call Sonex in the morning. In the meantime I pressed the prop bushings into the prop hub and installed the head bolts.Heard back from Sonex. My rods are bumpless -- use the stamped numbers for orientation.