
|

|
|
|
Roberts Web Site
|
Date: 1-11-2009
|
Number of Hours: 10.00
|
Manual Reference:
|
Brief Description: important note about prepunched skins
|
|
I have spent the last 3 days doing correction on the skins that I've already drilled and almost riveted. ******If you got the new prepunch skin for the fuselage, don't follow the old instruction and procedure shown on differents website including mine (the first construction steps).**********
With prepunch skin, we should not rivet stringer to bulkhead, neither install the inside corner at first. On those prepunch skins, there is a hole at every intersection of a stringer and bulkhead, so if you put a #412 rivet to hold the stringer and bulkhead in place, you wil end up, like me with a hole over every #412 rivet. When I ask Mike at Bushcaddy, about how to fix this, he suggest me to remove every #412 rivets and make doublers that I will put from behind every stringers, then drill a new hole.
The right prodedure should be :
--Fix the bulkheads to the table with wood blocks.
--cut and install stringers where they should go
--trace a center line on the edge of every bulkheads and also on every stringers.
--poistion the skin over that frame aligning the black line with the prepunch holes. Be sure to see the line through every holes. When everything is perfectly aligned, clamp in place and drill every hole and cleco in place.
--after the side skins and the top one are drilled, remove them and cleco every intersection.
You can now proceed with the inside corners, outside corners and then rivet the skin in place.
|
|
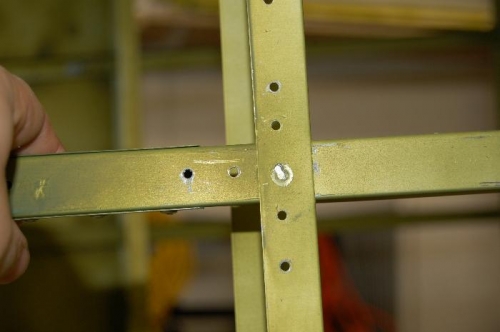
#412 rivet removed
|
|
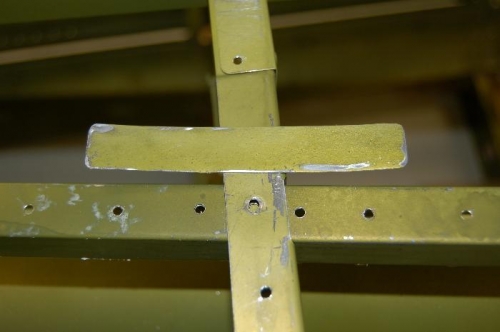
small doubler ready
|
|
|
|
|
|
|
|
|
Copyright © 2001-2024 Matronics. All Rights Reserved.
|