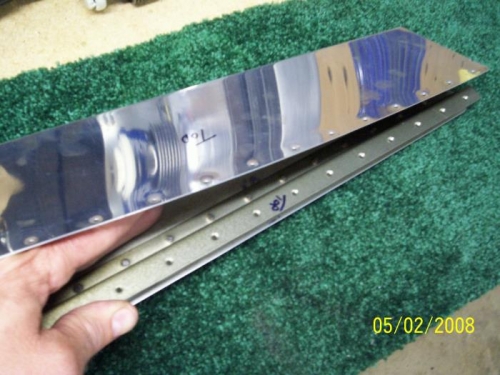
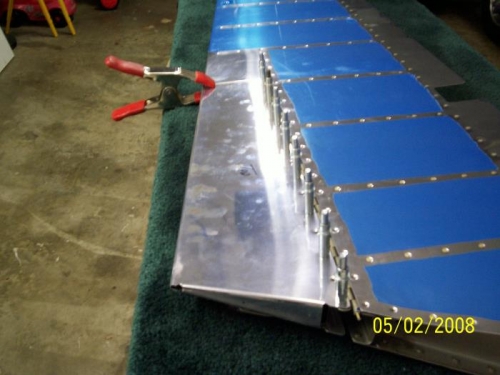
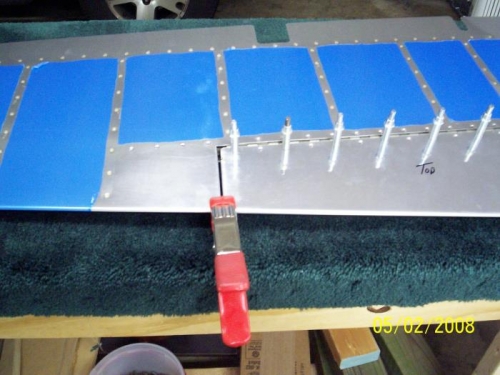
This evening I match drilled the aft side of the piano hinge that attaches the trim tab. Match drilled the bottom holes that attach the 606 trim tab main spart and 717 and 718 trim tab control horn. Disassembled the trim tab and deburred and dimpled skin, the 717 and 718 control horn and bottom side of tab spar. I countersinked the top part of the trim tab spar to match the dimples in the skin. Primed the parts and once they were dried I started the assembly process. The first part of the assembly was to cleco and rivet the 717 and 718 control horn. That was a slight challenge but I got them riveted with the hand squeezer. Next came the instruction to rivet the bottom of the 606 trim tab spar to the skin. That was quite and challenge because of the close working space. I didn't want to spread the skin back too much so I used a small flat bar and bucked the rivets. As you can see in the picture they all turned out good. I then installed the forward potion of the piano hinge to the aft side and clecoed the hinge to the trim tab 606 spar. I clamped the assembly to the left elevator in preparation for drilling the forward portion of the piano hinge and called it an evening. As you can tell the trailing edge looks really nice and straight.