Brief Description: Tank 2 Fuel Sender Complete & Tank Vent
Finished tank 2 today, same drill as tank one. I ended up going through two 3.5 ounce pro-seal kits from ACS. Actually not pro-seal, a different brand but same ingredients and cheaper: Chemseal B2 Tank Sealant
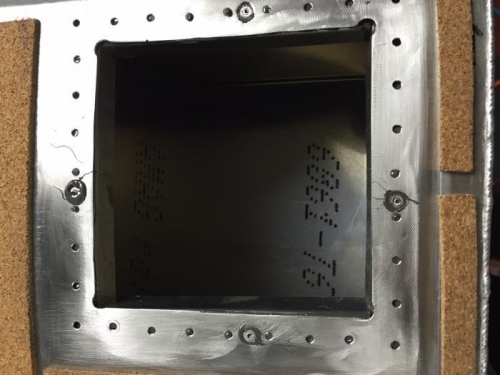
Pic of the large tank hole below shows the countersunk rivets holding the L angles in place prior to fitting the top skin part that holds the sender. All the holes line up and everything gets riveted together. The bottom perimeter of the top piece also gets coated with the sealant and the rivets get dipped even though they are closed end.
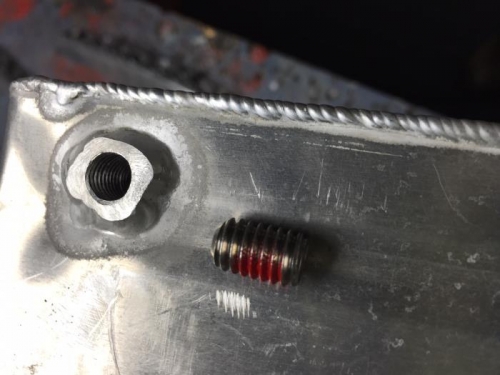
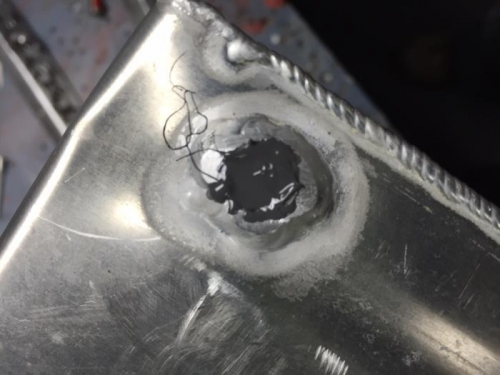
Additionally I am eliminating the stock fuel tank vent system...by all accounts they leak unless you keep the level at 3/4 full or so. I will vent the fuel tank caps using Homebuilt Help's Jon Croke's method...more to come on that.
So I cut the vent tube off the bottom of the tank as flush as I could get it. I then tapped the hole for a 5/16-18 set screw. I used a stainless steel set screw with nylon locking paste on it from McMaster Carr. I squirted the fuel tank sealant in the hole, put the set screw in as far as it would go, then squirted more sealant to seal it in there permanently. Put a 1" square piece of duct tape over the hole to hold the sealant in and turned the tank over to let it cure.
Countersunk rivets as placeholders until final assembly