
|

|
|
|
Michael's RV-10 Build Log
|
Date: 1-2-2021
|
Number of Hours: 4.00
|
Manual Reference:
|
Brief Description: Started Cowl Fitting
|
|
Well it's been a looooooooong time since I've posted anything in the log. Looks like about 4.5 years. While I haven't actually done a lot in that time, it's not exactly accurate. I've probably put in 100 hours working on misc things here and there like FWF, interior, wiring, cleaning up some random stuff, etc. I am going to try and start keeping the log somewhat up to date going forward. One of the things I've been busy with for the last year is dealing with the prop.
The prop, while brand new, is actually 14 years old now. I did talk to the MT guys at Airventure in 2019 about this fact and they felt that there should be no issue mounting and flying it. Just watch for any leaks or other issues and then deal with it accordingly. No need for an overhaul yet. Well due to the change to the Showplanes cowl from the failed James cowl I need to switch from the 14" spinner to a 15". Not a cheap proposition BTW. So, given this I decided to just send the prop to MT USA and have them give it a once over and change the spinner out.
Technology has changed tons, even in the last 5 years, and I have leveraged it for my build as many have. One of the things that I have done is created a spacer to simulate the distance from the flywheel face to the face of where the cowl needs to sit. The spacer I went with is 1 7/16" which should leave a 3/16" gap. Van's recommends an 1/8" gap which would be an 1.5" spacer. This also required me to make a plate to simulate the 15" face of the spinner. The spacer was easy to print but the spinner mockup was outside the range of my printer. So what else does any self-respecting DIY person do but build your own CNC router to cut the 15" plate. Probably should have just taken the file to a local cabinet maker and have them cut it but oh well. Now I have a 4'x4' CNC router. :) Now to fit the cowl I just clamp it tight to the spinner mockup and the spacing is all set. I also printed a cap for the center of the flywheel rather than stuffing paper in it. I also put all my
|
|
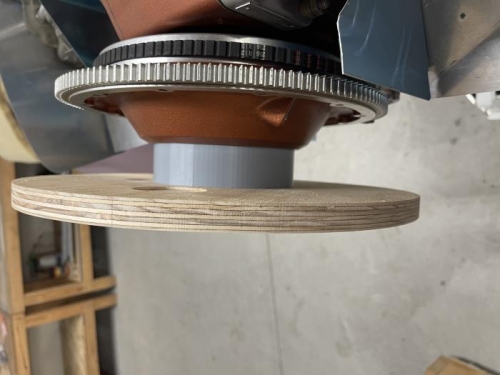
1 7/16" printed spacer and 15" spinner mockup
|
|
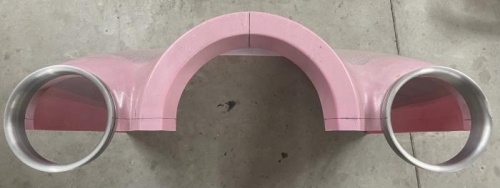
Using intake rings to set trim line
|
|
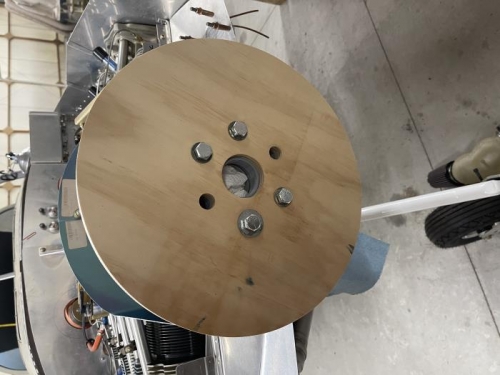
CNC cut plywood spinner mockup
|
|
|
|
|
|
|
|
|
Copyright © 2001-2024 Matronics. All Rights Reserved.
|