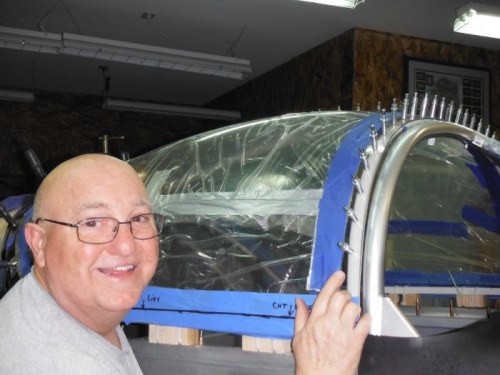
Brief Description: Drilling the Plexiglass to the Canopy Frame
I secured the plexiglass canopy to the canopy frame with clamps to drill #40 holes through the plexiglass into the sliding frame at 2-inch intervals; starting at top center and working aft and outward alternating from right to left securing with Clecos. If you press down very tightly on the plexiglass as you are drilling, a line appears on the canopy where the center of the tubing touches the plexiglass. This is the centerline you drill the holes to secure the plexiglass to the frame. I will drill and Cleco the aft bows once I figure out how to “match-drill” the aft skirts with the canopy plexiglass secured to the frame. I think I'll probably mark lines every two inches with a specific length to show where the hole centerlines are located on the canopy frame. I may also build a "hole finder" out of a ground-down hacksaw blade, split in half and riveted on one end with a hole and a rivet on the other end...don't know which method will be easier to find the holes while I'm trying to bend and stretch the rear skirts. I'm not looking forward to getting these done. Most guys I've talked to had to redo the skirts 2-3 times before they got them right. I'll also have to trim the plexiglass for the slider one more time so the side skirts can sandwich the plexiglass and be inserted above the frame bottom and riveted to the frame (see second picture below). I’ll also have to trim around the back to match the curve of the aft canopy frame bows.