Brief Description: Fabricating the Aft Slider Rail Assembly
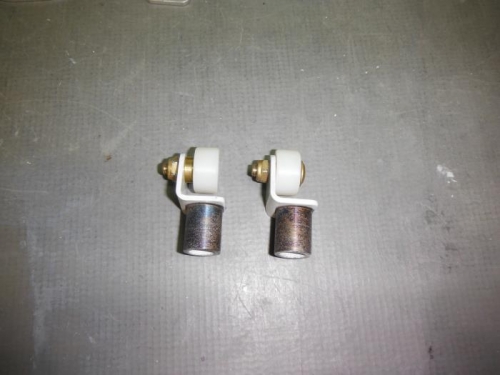
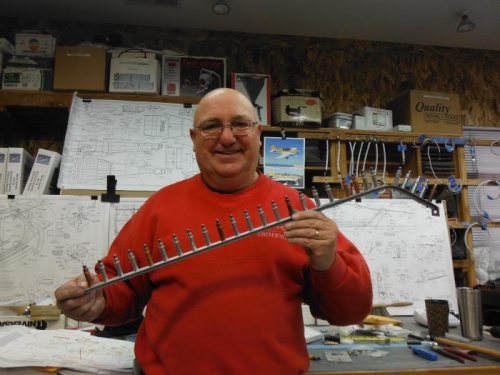
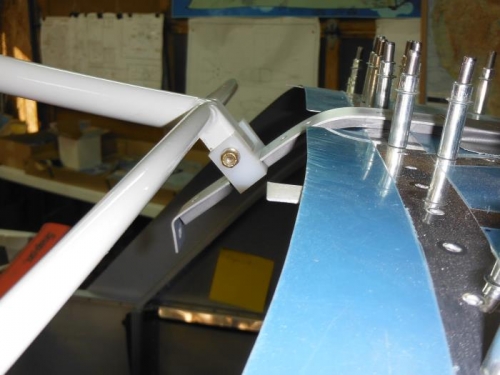
I’m back from Christmas with family in the Denver area and spent several hours reviewing all the Canopy installation instructions and diagrams. It’s a lot more complicated than I expected so what I thought was going to be a two-week process will likely be a month or two to get it right. Earlier this week I tried to slide the canopy frame on the canopy rails and realized I assembled the rollers incorrectly. The first picture shows the correct assembly on the left and the incorrect assembly on the right. I just inserted the roller wheel-bolt through the wrong side of the roller and it didn’t fit in the canopy tracks. Once I got that very minor issue corrected, I began fabricating the aft slider frame. The frame consists of a ½”x ¼” Slide Spacer (C-763) and a Canopy Slide Rail (C-762) which is riveted to the spacer. This assembly is bent at 45 degrees in the front and the Canopy Frame slides over top this rail. The angle and length of this assembly is what raises the canopy when it opens. The height of the canopy is adjusted by moving the rail forward or aft after the entire canopy is assembled. The second picture shows me assembling the Slider Rail Frame and the third picture shows the Canopy Slider Block Mounted on the back of the Canopy Frame and sliding on the completed Slider Rail Assembly. For now, I just have the Rail Assembly mounted on the aft upper skin with Duct Tape until I make all the Canopy Frame adjustments and actually attach the cut Canopy to the framework.