Brief Description: Testing baffle material placement
Worked on the righ side cowl tonight.
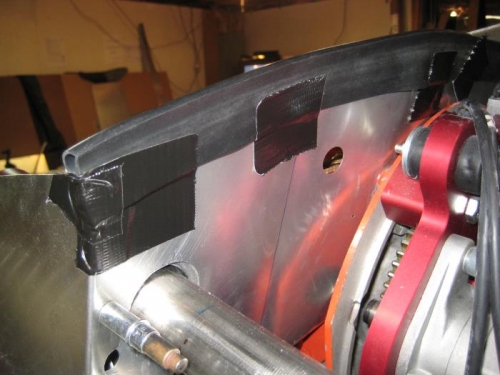
- Used duct tape to temporarily locate the baffle seals on the metal baffles.
- Used a flashlight to shine at both sides of the baffles to see if light leaked through.
- I determined the rear baffle seals needed to be raised up a little over 1/8" to get a good seal.
- Then I looked at the side baffle seal. This seal seems TOO tight, so I need to shave off about 1/4" of metal.
- And finally I looked at the areas across the entire front baffles, which are at the level of the lower cowl, so I could do that with the top cowl removed. Unfortunately there are areas where the METAL baffles are not nearly close enough to the cowl to allow the baffle seals to touch. So I actually have to ADD aluminum to the baffles here.
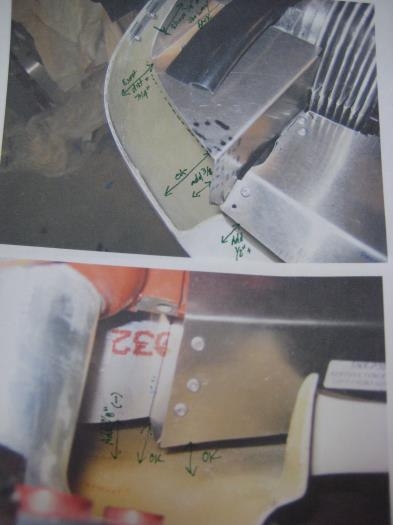
- In photo 3 you can see that I took photos of my baffles, then printed them out, and used those to mark up my baffle adjustment dimensions. Much easier than trying to remember, or to write the changes on the metal.
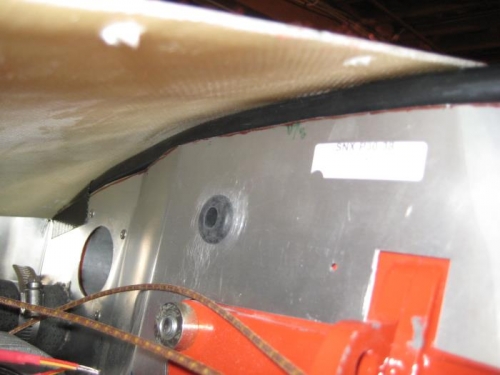
A view under the upper cowl, with the baffle seal against the underside of the cowl.
Some duct tape to temporarily hold the baffle seal material in place.
With printed photos of the baffles I could mark up where to make adjustments.