- Used a belt sander to remove some more material from the upper cowl to get a nice fit.
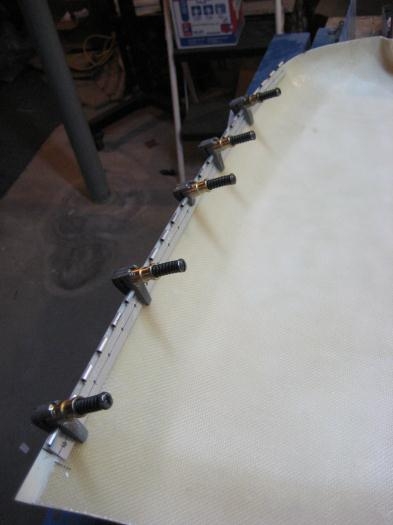
- Decided on a hinge length (22.5"), made a hinge-half, and drilled the pilot holes.
- Used cleco clamps to clamp it along the lower cowl, keeping the centerline of the hinge even with the edge of the cowl.
- Drilled the holes in the cowl using the hinge pilot holes.
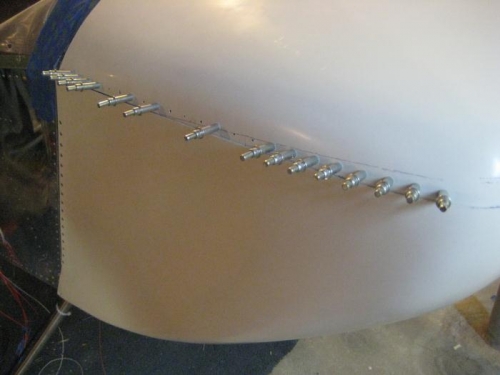
- Mated the other hinge-half and put the hinge pin in.
- With the lower cowl in place and the upper hinge half dangling above, I mounted the upper cowl and duct-taped it in place.
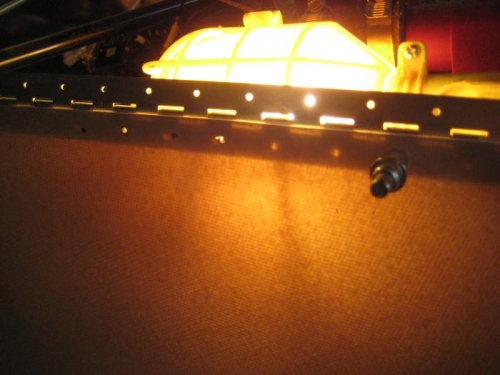
- With a shop light inside the cowl and DIRECTLY behind the hinge holes I drilled a few key holes to using the points where the light shone through (photo #3, but in th photo I removed the top cowl so you can see better). You MUST make sur the light is DIRECTLY behind any holes you are going to drill. If not, then even a slightly shifted light source will make the hole look like it's in a different location and you will not get alignment.
1st hinge half clamped in place on the lower cowl.
Lower cowl installed, and upper cowl laid on top, ready for shop light behind.
With upper cowl removed for clarity, here is the shop light shining through the hinge.