
|

|
|
|
Michaels Web Site
|
Date: 11-5-2012
|
Number of Hours: 0.00
|
Manual Reference: AeroVee
|
Brief Description: Pushrods & rockers
|
|
More photos...
Photo 1 shows the pushrod measuring tool, a cut pushrod, and the tip that the pushrod is being measured for.
In photo 2, a complete head assembly with pushrods and rocker assembly.
Photo 3 is the OTHER head. I had to cut more than 3/8" off each stud, but this time I knew I needed to take that much off, so I cut all 3 of the interfering studs as short as I could.
Others have said they really enjoyed building the engine. I was planning to feel the same way, but I don't. There is way more fiddling and hacking than I had expected. The video is woefully lacking in real information, and the manual is not much better. For instance, I had to watch the EAA video of Jeremy showing how to measure and cut the pushrods, to understand what I needed to do. Why isn't that information in the manual, or on the video?
Sonex has a reputation for not changing there ways. Instead they insist everything they do is right, and how dare we question them or make suggestions. Well, I have a suggestion: UPDATE THE FRIGGIN MANUAL AND DVD!!
Don't get me wrong; I like the crew there at Sonex a lot. But this is one of those customer service areas that, as far as I can tell, they have never figured out.
|
|
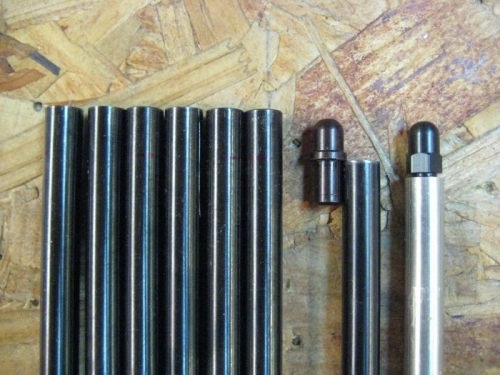
Measuring tool at far right, cut pushrod to its left and one of the tips to the right of that.
|
|
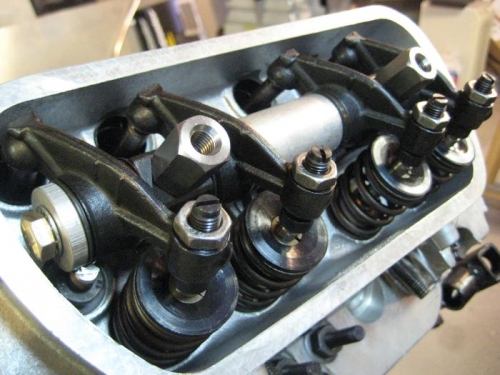
Pushrods and rocker assembly installed, and nuts torqued.
|
|
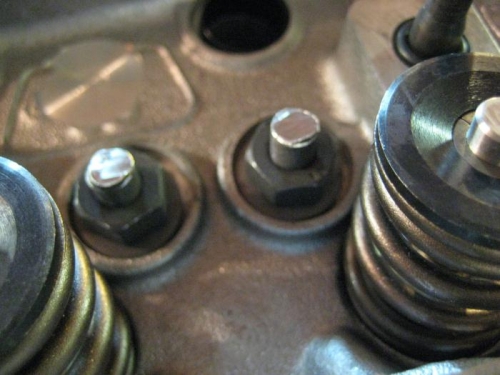
The cut studs on the OTHER head. These I cut down further than on the other head.
|
|
|
|
|
|
|
|
|
Copyright © 2001-2024 Matronics. All Rights Reserved.
|