
|

|
|
|
Michaels Web Site
|
Date: 6-6-2023
|
Number of Hours: 1.25
|
Manual Reference:
|
Brief Description: Repair RIGHT tank leak (1 of 2)
|
|
This past weekend I tested the RIGHT fuel tank. I had a bad feeling when I installed the rear baffle. I followed the Vans video tips, but they really did a dis-service on the rear baffle. They show to lay down a bead of sealant near, but not on, the rivet holes. That is wrong.
The bead needs to be laid so it touches the rivet holes, and then the bead need to be "pressed" onto the skin to create excellent adhesion. If you don't do this, then the bead of sealant will be hit-or-miss as to whether it will really seal the intersection.
In my case, I had 6 leaks from the rear baffle. NONE at any of the rivets or tank fittings.
So tonight I drilled out the rivets on either side of the leaks (4 of the 6) held the gap open with popsicle stick shims, pushed sealant down into the gap, clamped the baffle to the skin, and re-riveted. I just hope opening up the gap didn't cause new leaks on either side.
I only had enough suitable clamps to do 4 of the leaks, so I'll let those set up before I do the last ones.
|
|
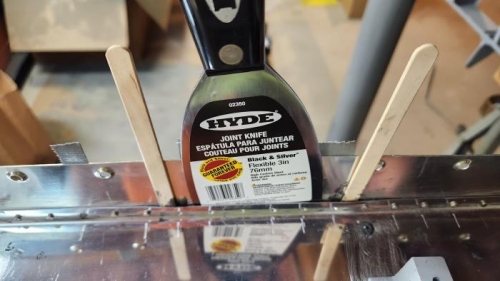
Opening a large gap with a putty knife, then inserting the popsicle sticks
|
|
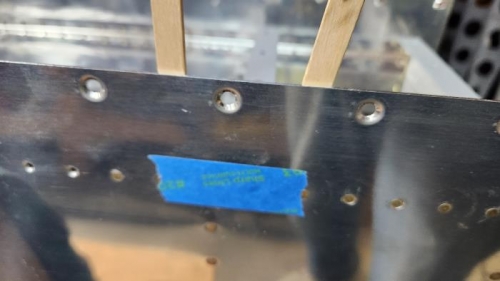
Tape to keep sealant from exiting the rivet holes
|
|
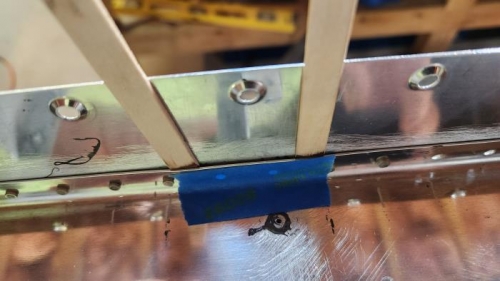
Popsicle stick shims
|
|
|
|
|
|
|
|
|
Copyright © 2001-2024 Matronics. All Rights Reserved.
|