Brief Description: LEFT tank rib & baffle (2 of 2)
Tomorrow I will dimple the baffle and install reinforcing ring and nutplates.
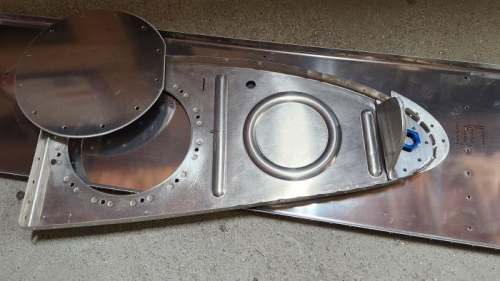
Photo 2 shows all the parts of the root rib: - Rib - Reinforcing ring with nutplates - Blank access panel (had to order that from Vans) - Tank support bracket at the nose - Reinforcing plate on the other side of the nose rib
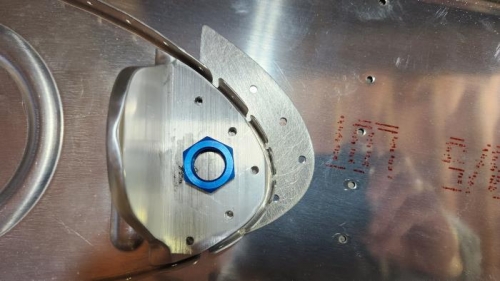
Note the aluminum nut in the 3rd photo. For the flop tube, the plumbing goes through the nose of the rib. Although there is a detail of this in a top view, there are NO details showing much else. Whey they neglected to show or note in the detail, is that you should NOT drill a rivet hole near where the plumbing goes through, or the plumbing nut will hit the rivet. Of course, in an earlier step they say to drill all the holes. So I ended up with a hole right where the nut and plumbing are going!
I filled the hole with a fuel tank putty, and made a new nose reinforcing plate that excluded that hole. So when I seal that area with tank sealant, there will be no path for fuel to get through. Another disappointment with the plans. It would have been so easy to make that clear with just one little elevation view and a note.
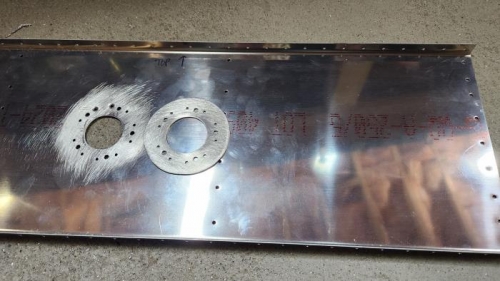
The holes in the baffle, and the reinforcing plate.
All the root rib parts
The flop tube plumbing goes through the nose of the rib