
|

|
|
|
Michael Heit Excalibur Build
|
Date: 11-7-2005
|
Number of Hours: 1.00
|
Manual Reference: AC 43.13
|
Brief Description: Part Four Wiring of Instrument Panel
|
|
Photo 1: After you have tinned the leads, insert them into which ever terminal you choose to use. I chose to use a round terminal connector as shown in photo 2. It is important to use the correct tool setting for the terminal used. One great thing about this particular tool, which is available at almost any place that sells tools, is that it is marked for the proper size wire to be cut, stripped, or crimp made. In the case of these particular connectors I used, a round type and the flat plug type, the case of the connector is Red, which happens to match the color coding of the tools crimp size. [22 ~ 18 ga] Photo 2: Here are the two types of connectors I am using in this project. Photo 3: This nifty tool is available at almost any auto parts store, hardware store, or tool sales catalogue. It uses the tip end for crimping, the inner side of the tool, surrounding the center screw body of the tool, it allows for the cutting off of small diameter bolts, and the section located in the handle will let you strip wire off using the proper size wire indicator imprinted on the body of the tool.When building an aircraft, don't buy cheap tools if you can avoid it. Learn the proper use of and care for, of the tools you use in yoru project.
|
|
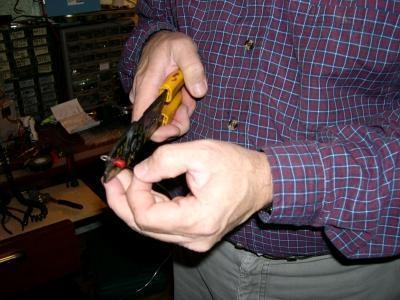
Making a good crimp
|
|
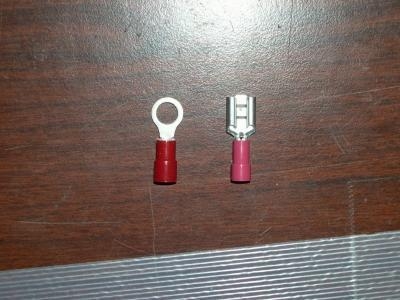
Types of connectors used
|
|
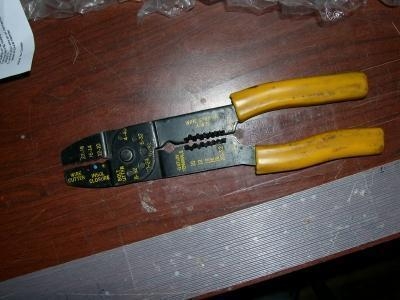
Crimp tool
|
|
|
|
|
|
|
|
|
Copyright © 2001-2024 Matronics. All Rights Reserved.
|