Brief Description: Battery Tray and Main Power Wiring
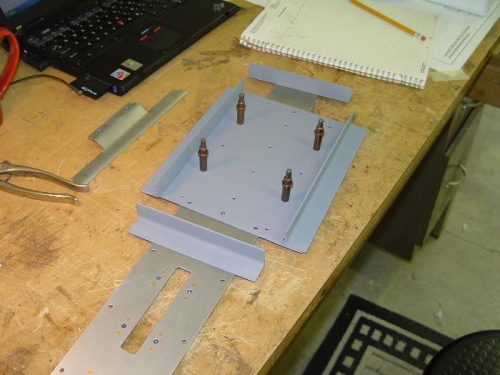
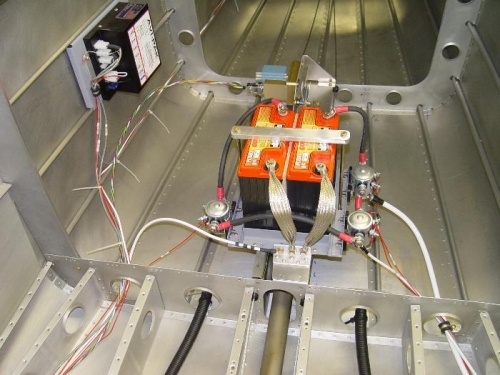
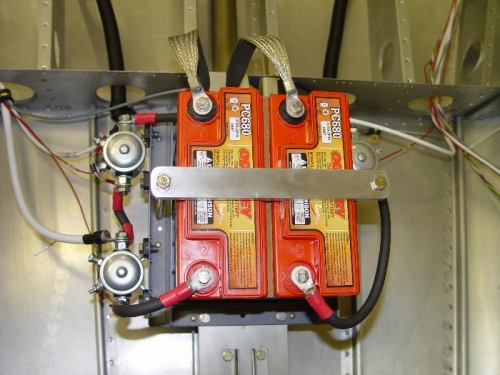
Expanded battery tray by adding 2024T3 ALUM SHEET .063 and 2024T3 ANGLE 1X1X1/16. The 2 main battery contactors and cross-feed contactor were mounted on same angle.
I used the Van's wiring kit diagram to route the main power lines and the wiring for the tail lights. I copied their left side wire routing from battery on the right side. I recommend this approach highly. No need to purchase kit but rather used the kit documention (available on Tim's builders' site) and used parts list to get the parts you need. And order duplilcate parts used in the left and right side routing.
Main power lines are AWG 2 for the starter and main buss. AWG 8 for the Auxilary bus. It seems to me important to plan main forward-aft wiring and install as much as possible now before closing up floors. The conduits are empty but will provide additional capacity after the floor is closed
Tray for dual Odyssey 680s- 4 angles to hold batts, 2 more angles on top for contactors (not shown)
Batts showing ground connection and contactor mounting - lots of angle stock used