
|

|
|
|
Marks Web Site
|
Date: 2-6-2021
|
Number of Hours: 1.00
|
Manual Reference: 7-9
|
Brief Description: Final prep for trail edge pro-seal (7-9)
|
|
Next step was to attach the shear clips. I got this…after building an RV-12, I certainly know how to pull some rivets. I grabbed the first shear clip to attach the to the shortest rib and pulled away. No problem, perfectly set every time. I grabbed the next shear clip but wait this is smaller…oops I mixed up the shear clip and attached the wrong one. I got this…after building an RV-12, I certainly know how to drill out a pull rivet. Ok, lets start over now, right shear clip, in the right spot. The rest went smoothly…pulling rivets is so easy…wouldn’t it be nice if you could make a whole plane with pull rivets.
Next, I wanted to place all the parts in position and do a trial run of the assembly in prep for the pro-seal operation on the trail edge wedge. Again, another obstacle I didn’t count on. The rudder horn (now attached to the right skin, keeps the skin from laying flat on the tabletop. I had no choice but to drill a slot in my workbench. With the slot now the right rudder skin lays flat. I’ll just have to find away to fill it back in, so I don’t mess something else up down the road. Next step will be pro-seal time. I plan to do a trial run with my lovely assistant, Cyndi, before spreading the pro-seal.
|
|
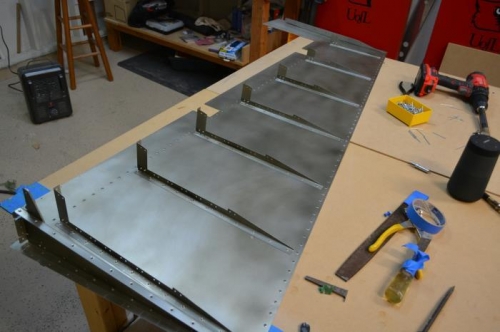
Shear clips attached (21-020)
|
|
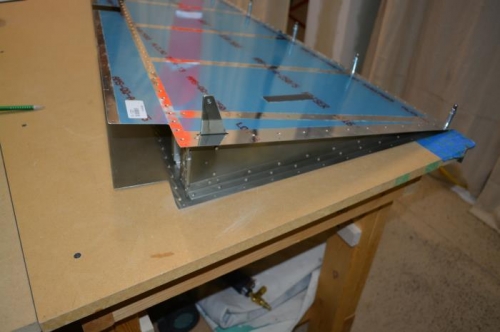
Rudder assembly trial fit with rudder horn going through slot in workbench (21-021)
|
|
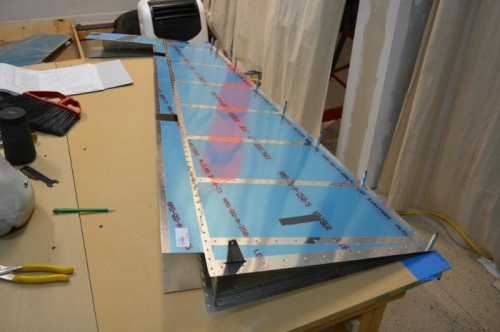
All ready for the next step…pro-seal (21-022)
|
|
|
|
|
|
|
|
|
Copyright © 2001-2024 Matronics. All Rights Reserved.
|