
|

|
|
|
Larry Winger's 601XL Project
|
Date: 6-15-2014
|
Number of Hours: 5.50
|
Manual Reference:
|
Brief Description: 1 - Installed flap position sensor
|
|
My first job was to extend the wires connecting the Ray Allen position sensor to the EFIS. When I originally wired the unit, I had no clear idea where it would finally be placed. Following the lead of a couple of other builders, I made a template to determine the arc of travel for the flap actuator arm. The problem I was trying to solve is that the flap motor moves 50mm, but the Ray Allen sensor only travels 23 mm (NOTE: It actually travels further, but there is movement at both ends of the scale that does not register). So the trick is to find where in the arc of travel does the flap actuator arm only move approximately 23 mm. For me that was about 60 mm from the point where the two lines converge. That is where you drill a small hole, 5/64" in my case. The bracket for the sensor must match the basic angle of the pushrod connecting the two, which in my case was about 22 degrees. I went to a well-equipped hobby store today and got a threaded steel pushrod with a speed clevis for under $1,00. The clevis goes through the hole in the sensor arm and the other end is bent to go through the hole in the flap arm. Because it is threaded, I was able to make fine adjustments by turning the rod until everything registered perfectly. At that point, I put a small bend on the back side of the hole to keep it from coming out. Lots of precise work today, but it paid off with a perfectly calibrated LED flap gauge.
|
|
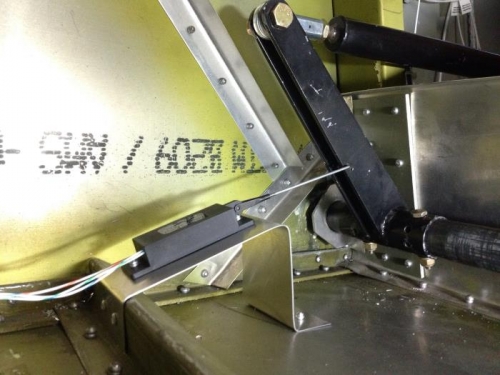
Ray Allen position sensor in place
|
|

Template to determine range of the flap arm
|
|
|
|
|
|
|
|
|
Copyright © 2001-2024 Matronics. All Rights Reserved.
|