Cut the push-to-talk wire from the control stick to the correct length to connect to the radio wire bundle. Installed a three wire plug on the push-to-talk wire. Care was taken to align the pilot push-to-talk wire on the left side of the plug.
Removed the aileron tabs from the control stick and replaced them with a single tab configured with connections on both ends. Replaced the bolt with a shorter bolt and used two washers around the tab.
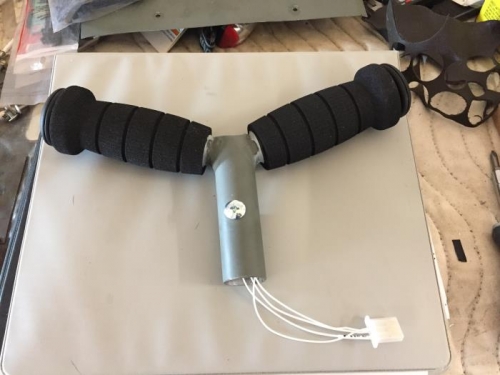
Set the yoke on the table and marked the location for the drilling of the mounting bolt. Drilled a 1/4 inch hole through the control yoke. On the front side of the yoke enlarged the hole to fit the embedded cap. Installed the plastic tubes on each side of the yoke securing in place with silicone glue. Set aside for the silicone to dry. After the silicone had set up added the foam grips to each side of the yoke. Slid the wires of the push-to-talk caps down and out the bottom of the yoke. Slid the caps down over the plastic inserts and under the foam handles. Cut one wire from each of the bottoms and wrapped the ends together. Applied flux and then soldered the ends together. Crimped a terminal on the ground wire and inserted it into the center slot of the plug. Identified the pilot push-to-talk lead and installed a label on the wire. Cut the wire to length, trimmed the coating and soldered the end. Crimped the terminal to the wire and installed it on the left side of the plug. Repeated the process for the copilot's push-to-talk wiring.