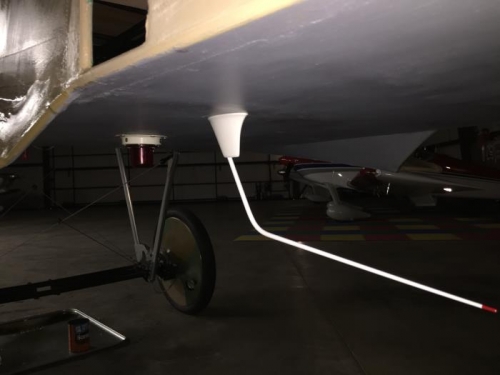
Brief Description: Installed VHF Antenna and Beacon
Inspected the paint and sanded several ruff areas. Used the soldering iron to remove a small bump on the fabric on the forward right side of the fuselage. Installed a small patch on the area where the bump had been removed.
Located the opening for the beacon in the under side of the fuselage and used the soldering iron to melt out the opening. Located each of the 5 anchor nuts and melted out each opening. Installed the mounting ring over the opening with 1032 screws. Took two tries to get the alignment correct on the ring and the anchor nuts. Attempted to install the beacon assembly and had to remount the grounding lug to clear the mounting ring. In attempting to install the first screw into the beacon found the holes in the mounting ring were too small. Removed the ring and drilled out each of the holes. Remounted the ring and installed the beacon. The alignment of the mounting screws were unique and required several adjustments to get all three screws aligned. Applied some blue lock-tight to each of the screws used to mount the beacon to the mounting ring.
Melted out the opening for the antenna mounting with the soldering iron. Installed the antenna using lock washers on each of the mounting bolts and tighten down the nuts to ensure a good ground. Connected the antenna cable to the antenna.
Located the mounting holes on the right side landing light opening. Melted out each of the holes on the top and bottom of the wing stub. Cleaned up the mounting clips for the lens with MEK. Moved to the left side and repeated the location process on the wing stub. Completion of the mounting will occur during the next work day.