Brief Description: Installed Electric Plugs for Left Wing and Tail Li
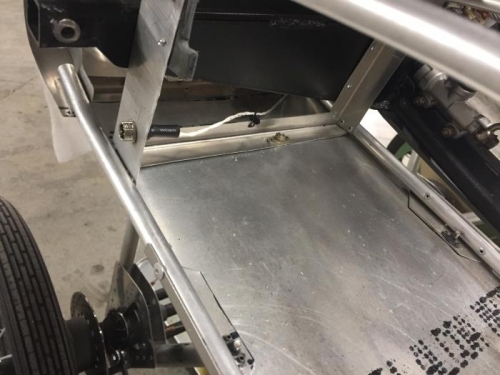
Removed the two ground wires for the old key master switch from the firewall. Measured the length and cut two new ground wires covering the full distance from the switch to the firewall. Printed four labels for each end of the ground wires and slid them onto the wires. Crimped eye terminals to each end of the wires and covered them with heat-shrink tubing. Heated the tubing to secure each segment in place. Secured the ground wires to each other with tie raps spaced about every 3 inches starting at the switch end. Installed the ground wires between the firewall and switch completing the circuit.
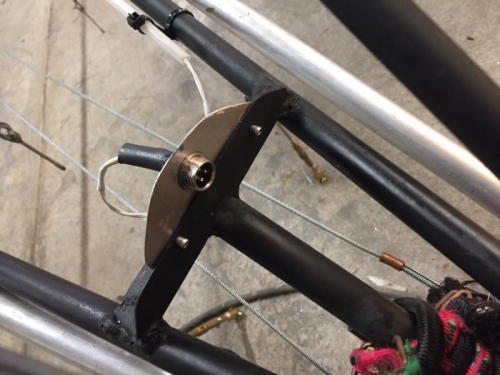
Drilled a 9/16 inch hole using a step bit into the front rib bracket about 2 inches from the bottom of the rib. Threaded onto the wire for the left wing light a 1 inch segment of 1/2 inch heat-shrink tubing, a nut, and a 1 1/2 inch segment of 1/8 inch heat-shrink tubing. Pulled the left wing light wire through the hole in the bracket. Pealed back the outer coating on the wire about 1 1/2 inches exposing the two colored 20 gage wires. Slid a 1/2 inch segment of 3/32 heat shrink tubing on the red wire and then soldered it to the right top pen in the plug. Slid the heat shrink down over the pin. Repeated the process for the black wire on the top left pin. Used a heat gun to secure the heat-shrink tuning to the pins. Slid the 1/8 inch heat-shrink tubing down to the pins and secured it in place with the application of heat. Slid the plug into the hole in the bracket and screwed the nut onto the plug. Applied a drip of blue lock tight and tighten the nut completing the installation of the left wing light plug.
Repeated the above steps for the tail light plug which was mounted into the bracket added above the tail wheel cross brace.