Finished drilling the left side mounting holes in the front of the forward fuselage cover and secured it to the firewall. Checked alignment and measured the position of the fuel tank fuller opening which will be installed for the fuel tank. Removed all mounting screws and removed the cowling and front covering. Replaced a loose rivet in the front center area of the covering.
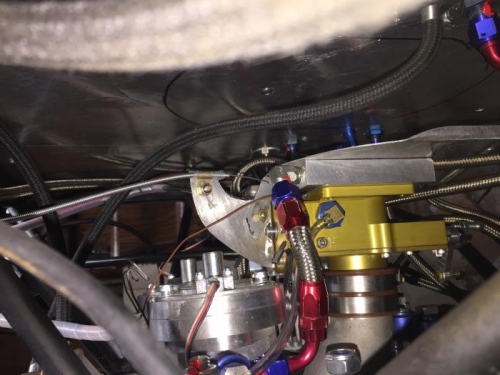
Installed the primer control wire assembly through the instrument panel lower flange in the 1/2 inch hole left of center. Put blue lock-tight on the retaining nut and tighten to hold the assembly in place. Ran the other end of the control wire through the firewall grommet and down to the carburetor. Put the control wire through the primer action arm so the Z form engaged the arm. Rapped a small segment of silicone tape around the end of the assembly and secured it to the carburetor using a small cable clamp and a 1032 bolt with lock nut. Tested the assembly. Found it not working smoothly. Added WD-40 to the assembly over it length and the results were much better. Adjusted the amount of the assembly that was in the engine bay to ensure clearance to the carburetor and tighten the firewall grommet to secure the control wire assembly.
Positioned the carburetor on the intake and tighten both clamps holding it in place. Used a small segment of black tape to secure the carb temp sensor on the oil cooler so it lay at the top of the carburetor intake. Placed the front air intake plate on the oil cooler and secured all to the carburetor using four 1/4 inch bolts with lock washers.