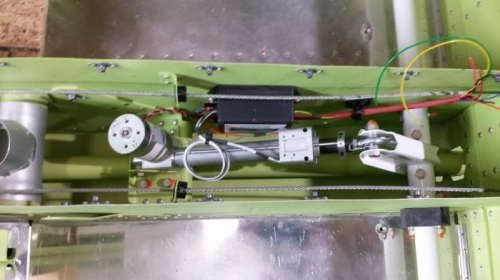
Brief Description: Flap position sensor in/then out
So I decided to install the flap position sensor supplied with the kit. I spent most of the day getting everything positioned correctly and mounted into the tunnel. Everything is in place and ready to do the initial wiring.
I have long since decided to use a VPX-pro electronic circut controler as the backbone of the electrical system. I spent the evening reading the VPX-pro install manual starting to wrap my brain around the electrical system. It turns out that the flap control of the VPX does not use the stock Vans flap positioning sensor. Out comes the FPS from Vans, and the correct one to work with the VPX goes on the list of things to order.
Just a comment: For anyone approaching the electrical system, even if you are not intersted in using a VPX in your system, read the installation manual (free from their web site). You will get all sorts of info on how to tackle this daunting task. It is well worth it.
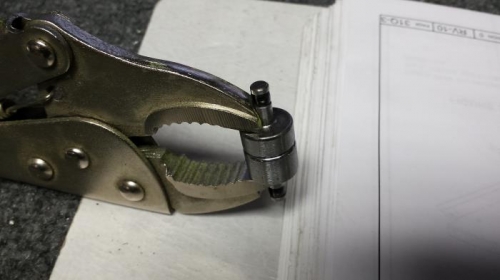
On to the upper front fuselage. Everything was moving along well untill I realized I had bent the inner panel bottom the wrong way. No biggie since the bend is only 7.3 degrees. The only issue was figuring out how to clamp since the flanges prevent me from using my box brake. Wood blocks to the rescue. I did have on dimple on the ribs that was impossible to get with the squeezer. I modified a $4 pair of HF vise grips to squeez the #30 dimple dies (see pic below).