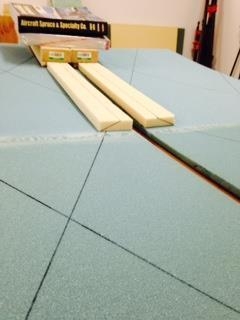
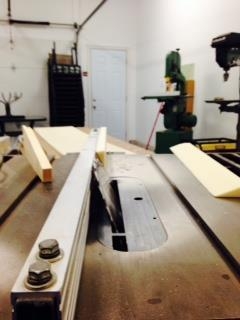
Using a utility knife I cut out two pieces of 19 3/8" x 2 1/2" from the 3/4" Last-a-foam and used a table saw to create the beveled edges as per BB of Figure 7. I did minor sanding after the table saw cut.
The shop temperature was raised to 25 deg C and humidity was 30%.
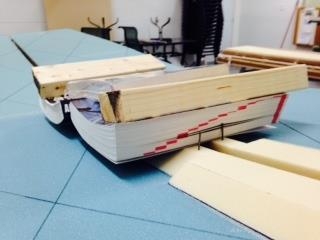
I mixed a batch of micro slurry: 56g L335 epoxy resin with 21g H340S hardner + 2 spoons of microspheres.
Using a squeegee I applied the micro slurry to both fuselage sides and then to the mating surfaces of the beveled pieces and positioned the pieces on the fuselage sides (I had pre-marked the location where they go so I knew where to put the micro and the pieces). I applied pressure to both pieces and wiped away any excess micro with paper towels. I used 3 nails in each piece to temporarily hold the surfaces together and I placed weights on both pieces while they cure overnight.
I measured the lengths I need for the next pieces (CC) and marked them on the LAST-A-FOAM so I can cut them out next time. These pieces need to be 63 3/4" x 2 1/2" as per figure 7 and my measurements.