Reattached the leading edge skin to the top of the main spar to finish the landing light installation and test the fuel filler hole I made in the skin yesterday.
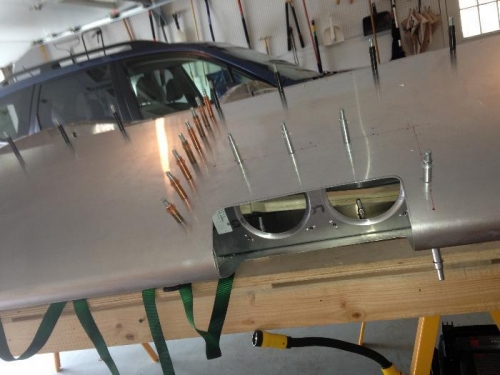
The landing light installation consists of a lot of measuring off of a lot of already-installed parts to get it to fit in properly. The light housing attaches to the #7 nose rib on its inboard end, the top and bottom of the leading edge skin along its span, and it has its own "mini-nose rib" for the outboard end. So after lots of measuring and standing up/sitting down (for the top and bottom portions of the leading edge skin), I got the rivet lines laid out, drilled out (pilot holes) and the whole assembly clecoed in place.
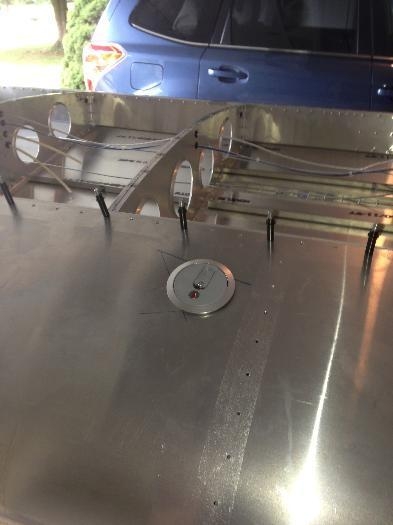
While I had the leading edge skin fully attached, I was able to check the placement of my fuel filler hole. I'm happy to say it's in the right spot in the leading edge so the acrylic template technique is a real success. I'll need to build up the cork around the fill hole on the top of the tank to make sure the threaded flange cap assembly (aka, the fuel cap housing) fits snugly against the leading edge skin.
The landing light assembly being drilled out for riveting.
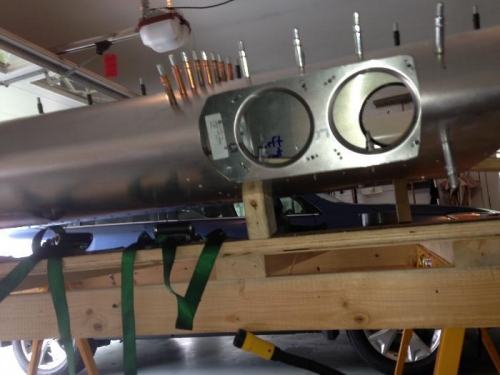
Fully drilled-out landing light assembly.
Fuel filler cap threaded housing temporarily installed through the leading edge skin.