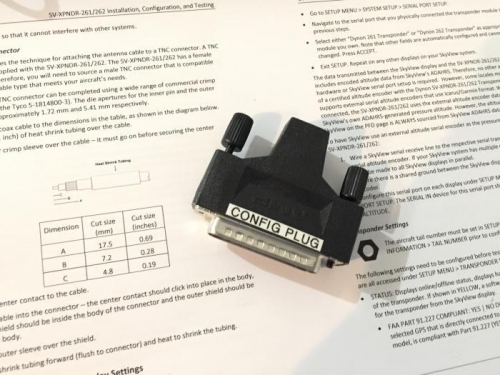
I spent much of the day yesterday mulling over the transponder issue in the background when an idea struck me. I looked into the Approach Fast Stack configuration book. These are the guys that custom built my Dynon network including a fairly impressive network hub and nearly all of the various cable harnesses you see in picture 2 below. By investigating their breakdown of all their network hub connections by wiring harness down to the pin level for each connector, I noticed a pattern that kept referencing the configuration port on the hub. Suddenly I remembered the item in image #1 - the configuration plug - which was still in my basement being ignored as superfluous. Ha! I plugged it in to the configuration port on the hub and the transponder came to life.
With that behind me I also: - Fabricated the VHF antenna cable and temporarily installed it. - Wired up the buttons on the control stick: Left seat transmit button, right seat transmit button (both are on the one stick), radio flip/flop button (trigger), and IDENT (index button on front of the stick which is like the nosewheel steering button on most fighters I flew). - Connected the tachometer sensor on the EMS to the ULPower tachometer output from the ECU. - Connected the fuel flow sensor on the EMS to the ULPower nozzle pulse measuring output from the ECU. - Tested the radio and transponder functions including transmitting and receiving.
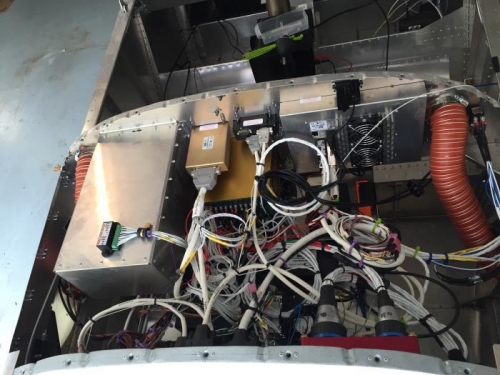
The avionics bay is complete ... for now.
The missing culprit - a Dynon config plug - put everything back on the rails once installed.
Avionics bay all wired up and secured. It's a pretty dense collection.
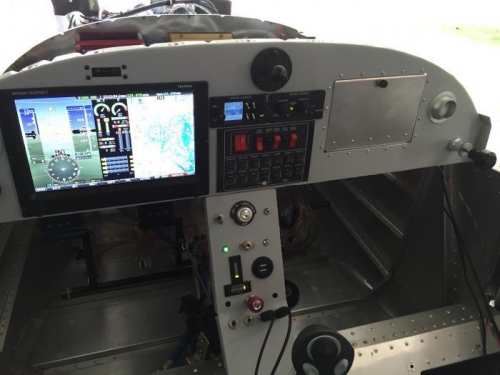
The business side with Skyview monitor, radio, intercom, etc all functioning off the battery.