
|

|
|
|
ALAN'S WEB SITE
|
Date: 3-4-2009
|
Number of Hours: 3.25
|
Manual Reference: DWG 27A
|
Brief Description: Attach Vertical Stabilizer
|
|
This was a BIG evening. I have been thinking about drilling the bolt holes for the vertical stabilizer for 3 weeks. (Ever since I attached the horizontal stabilizer.) I had read about all I could read about how other builders installed the stab and decided it was time.
I spent over 2 hours just drilling 6 holes. I seem to goof up when I hurry, so I took plenty of time and put a great deal of thought in everything I did.
I clamped everything in place took measurements in about every configuration you could imagine. When everything was perfect, I drilled the first hole. When I took a measurement from the top of the vertical stabilizer to the end of the horizontal stabilizer... I almost had a heart attack. The tail had slipped over a half an inch out of place. Come to find out, the tape measure was hung up on a rivet. Luckily, when I re-hooked the tape measure and measured again, everything was still true.
After drilling the 6 bolt holes into the bulkhead, It was time to check the front attach point. (Where the vertical stabilizer connects to the vertical stabilizer attach plate.) When I was test fitting it, it looked like the best position was the stabilizer spar sitting in front of the attach plate. The drawing looked to me like it was behind the attach plate but the directions said it could be attached on either side. After closer study of the plans, they do show it in front of the attach plate. (Boy, you have to look close!) I used a square piece of aluminum to check the alignment of the hinges for the rudder. With the spar sitting in front of the attach plate the hinges line up almost perfectly.
While everything was in place, I test fit the fairing. It looks like a finished plane with it in place.
I used the angle drill to backdrill most of the holes attaching the attach plate. Then, removed everything and completed drilling the holes. After deburring the holes, I shot a coat of primer on the attach plate and went to work deburring everything else. (I was hoping to rivet th
|
|
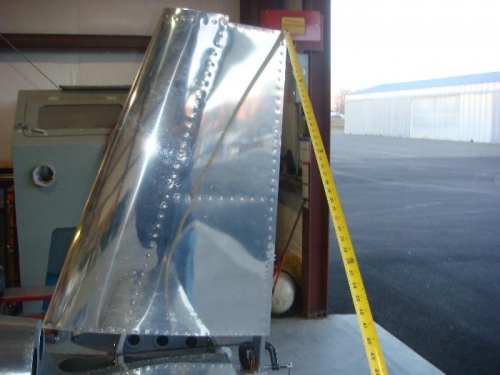
Measure, measure, measure
|
|
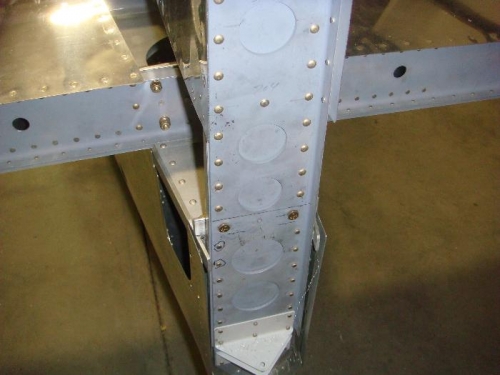
Drill
|
|
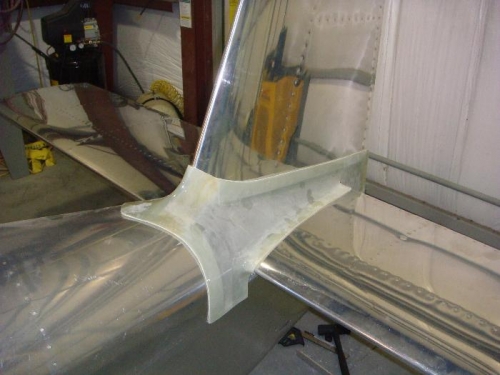
Test fit fairing
|
|
|
|
|
|
|
|
|
Copyright © 2001-2024 Matronics. All Rights Reserved.
|