
|

|
|
|
Kurt Haller RV-9A
|
Date: 12-4-2017
|
Number of Hours: 0.00
|
Manual Reference:
|
Brief Description: Wingtip fit up; oil door
|
|
This entry is a continuation from 12/3...dated 12/4 so it would follow the first 12/3 entry.
After taking out clecos and removing the tape (surprising how strongly the tap held the tip in place; but I wouldn't fly it tape only!), I clecoed 6-32 nutplates to all of the holes. The right tip shown in image 1.
I'll drill one "ear" on each nutplate, insert a 2nd cleco, then drill the other ears. I think it best to bond the 0.020 Al strip to the inner side of the fiberglass, as called for in the case of riveting the wingtips on semi-permanently. The epoxy/flox will better take up shearing loads that could otherwise wallow out the fiberglass. Won't have to worry about setting the nutplate rivets fully.
So, when all the holes are drilled, I'll remove the clecos and nutplates, match drill the 0.020 strips, roughen up the fiberglas and Al with 60 grit and flox the strips in place, using waxed clecos for clamp-up. Then I can enlarge the center holes with a #28 bit for the 6-32 screws, countersink for the #6 wing skin dimple, and csk for AN3 solid rivets at each platenut ear.
Spent some time fitting the oil filler door to the upper cowl. Epoxy and paint build up on the inside of the cowl interfered with the hinging action. I wound up filing the hing barrels on the door a bit so the hinge pin would go in. Action is a still a little stiff, which is OK because the joint won't rattle and wallow out in service. Need to replace the oil door hinge pin with stnlss--it is still the original Al.
|
|
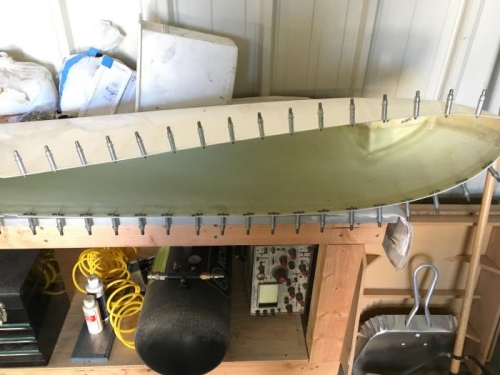
Nutplates for 6-32 screws ready for drilling on the right tip.
|
|
|
|
|
|
|
|
|
Copyright © 2001-2024 Matronics. All Rights Reserved.
|