Brief Description: Elevator counterweight rework I
This and next 3 entries completed over the course of June 2019.
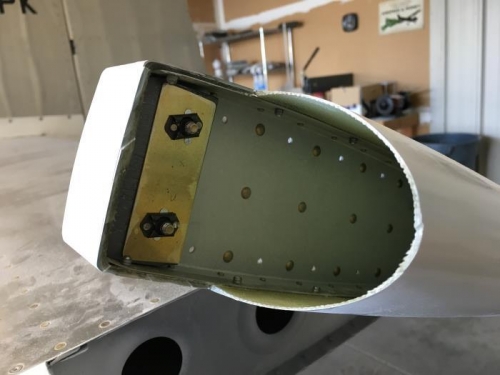
Before hi-speed taxi test, Barry W. (additional pilot) balked at the slim clearance between the lead elevator counterweights and the horizontal stab. I cut off the caps of the elevator "horns" as in Image 1 to give myself plent of room to work. Removed in- and outboard weights, Fabricated a brass plate with brass riveted brass bushings that fit into the cast-in counterbores of the outboard weight, with floating nutplates to take the bolt from the inboard side.
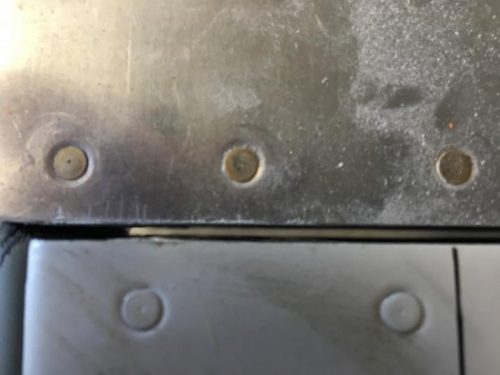
Inboard weight was squeezed about 1/16" thinner with Karl's 20 ton shop press, and Pb was removed from inboard plate so that total mass before was about equal to total mass after, including two nut plates and AN3 bolts just behind the inboard cntrwgt (Image 2) which will be used to balance the elevators after they are painted.
After reinstalling, the inboard weight doesn't extend into the "horn" to stab gap (Image 3).
The nutplates replaced plain nylock nuts, which meant it would not be possible to snug up the counterweight bolts if and when (that would be WHEN for creeping lead!) clamping force was lost due to the permanently attached fiberglass tips. Won't be a problem now....
Left elevator horn w/cap removed showing nutplate gizmo.
Extra nutplates to balance elevator after paint.
Inboard ctrwgt used to fill about half the gap between elevator horn and horiz. stab.