Brief Description: More top cowl fit adjustments and epoxy bottom cow
With top cowl still hinged in place, I removed the pin and clecos holding the right side top hinge from firewall and made another bu cutting and bending to shape and putting in position thru oil door and sliding pin in. I then simply match drilled it thru the firewall and upper skin holes. I didnt like how it turned out so I did it aGAIN! Made this part 3 time now. Once staisfied I clecoed it on and tried removing and then installing cowl. Now I can get it on and off. Pins are kinda tight but Ill work them some more.
Removed the top and bottom cowl and all the hinges.
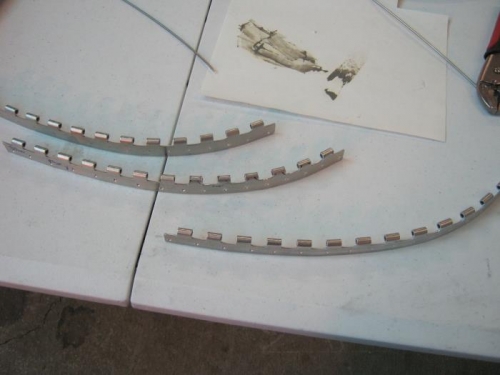
Filed the eyelets to a bevel on new hinge and filed eyelets that are a bit snug on all the hinges along firewall top
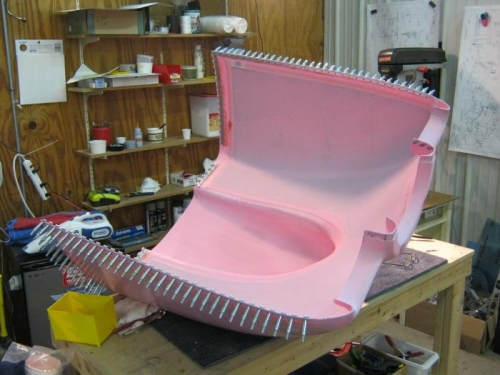
Started on bottom cowl by sanding the areas for hinge epoxy and also ended up sanding other areas inside the cowl as well
Epoxy with fast hardner and flox the six hinges being careful to keep away from eyelet areas and then clecoed on
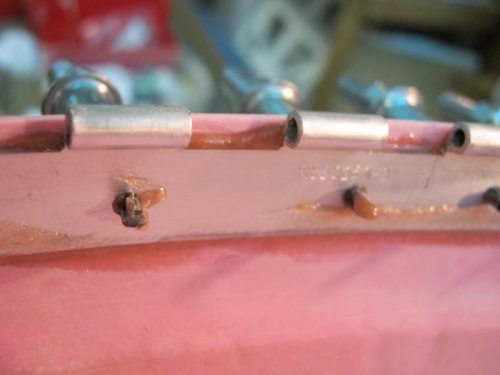
Picture 2 shows how the resin can seep out and thouigh it doesnt block the hinge pin hole, it blocks the mating hinge from seating properly if allowed to stay and cure. This was a problem with my top cowl and is difficult to remove when cured.
Went thru every eyelet on bottom cowl as well as the recessed edge with a pick and racor blade several times to make sure all is clear. This should work much better...I hope!
RT side top cowl firewall hinge redo 3
A hinge on bottom cowl after epoxy and cleco of epoxy oozing into the hinge recess. I cleared them