Brief Description: Left and right elevator tips installed
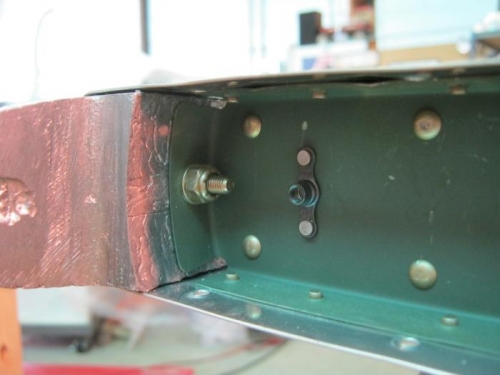
1. I have seen another builders log where platenuts were installed in the elevator swing arm under the tips and adjacent to the lead counter weight. This was done so that extra weight can be attached from the other side if after painting the elevators, balance is off. I did this just incase.
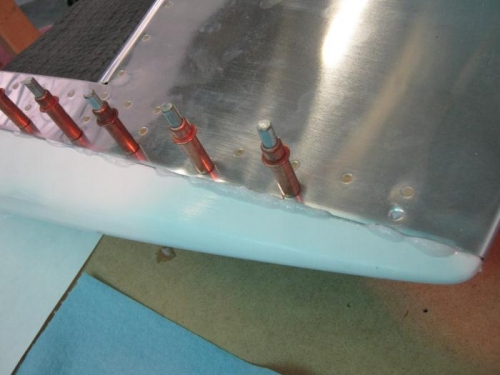
2. I had a small amount of proseal tank sealant left and decided to use it to attach the tips to the counter weights. I also mixed up a batch of west systems epoxy and added some flox for bulk and then spread it along the tips flange. After clecoing in place you casn se where the excess resin oozes out. The thinking here is I can wipe off the excess resin and that seam will be filled. Also I hoped that after riviting, there will be very little puckering between the rivits.
3. Pop rivited the 18 holes on each tip. Note! The trailing edge most rivit on each side are not offset from one another and hit eachother. Some folks will fill one of them and move the hole. I did not but managed to get it done. Be sure to do the top side first to ensure good looks. The bottom rivit will not seat when installed but I would squeeze it slightly and push on it and squeeze some more and push on it hard and so on untill it finaly was flush with the dimple and squeezed fully. It worked but isnt as nice as the others are and so being on the bottom is better. I think it will look fine if I sand the head some and use some filler.