1. Lay out the locations for the 3 small gauges and the 3 full size gauges on rt side. I marked the center locations and then the mounting screw holes. I spent some time making sure I woluldnt have any interferance issues with the flange of side skirts that goes beneath nor with other gauges and their adjustment knobs. It will fairly tight fit for the 3.1/8" gauges.
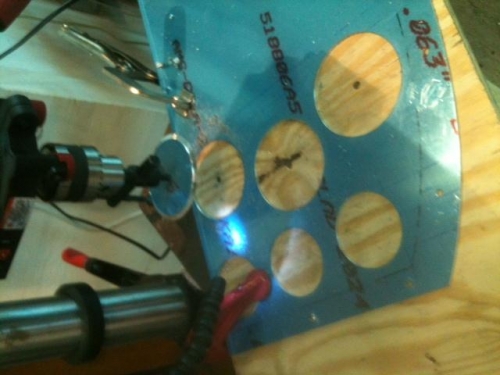
2. Set up the drill press, Center punched and pilot drilled. Screwed the panel down to the wood base and lined up and then clamp down. Cut out the first hole. Then it was a matter of repositioning and secureing and then cutting X5 more holes.
3. Test fit gauges and since they were pretty tight, had to open holes slightly with filing and sanding or scotch brite wheel on die grinder until fit was nice.
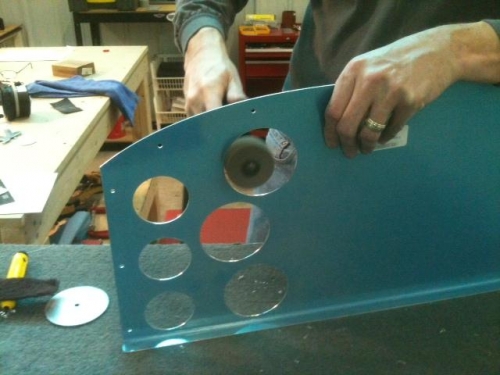
4. Used my instrument hole jig to mark screw hole locations on all the gauges. Made sure they were square so that the gauge faces will be level and then marked and center punched. Drilled first to #40 and then clecoed in place to verify they were all squared up. When satisfied I drilled to 5/32 (i think) for #6 size screws.
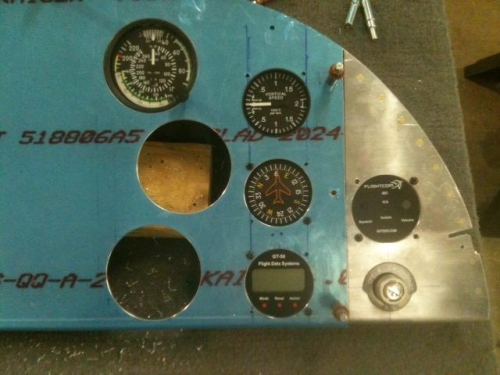
5. Test fit all the gauges
6. Marked and then drilled out the hole in sie skirt for the ignition switch, ebure it an then test fit the switch
All is loking goo so far. I need to order some mounting harware and also mark an cut the adjustment knob locations off the bezel rings of the altimeter and the tru trak next.