Brief Description: Final flap rod adjusting, aileron adjust, Flap fai
Today was mostly spent getting the flap rod holes to clear the rods through full range. Its not hard but is very time consumming since it takes awhileto remove the rod and file the openig up slightly, re attach everything and check for clearence, remove and repeat. The hole in fuse skin is where I had to work the most but the floor skin hole had real tight clearence too. I just relieved it. Also checked the reief cut outs in the floor rib for good clearence. Once satisfied with the flaps operating freely, I readjusted the aileron on left side to dead center on the jig. I then was able to final adjust the flap rod length until flap was in perfect alignment with aileron trailing edge. I coluldnt be happier with how well everything lines up so nice.
Removed the crappy threaded bolts in the rotisserie that I was using to attach to the firewall with some An3 bolts of the same length that I had ordered. It was bugging me all this time so I just changed them out
I also put the Correct bolts called for to attach the aileron push tube to the control column
Lubed up the 12 An3-12 and thin washers under hex head and installed in the centersection. These were not done earlier as required and I needed to make sure the wing install did not flex anything due to the bolts not being installed. I am happy that they fit just fine. I cant install the nuts on the interior of that center section until after the wings are removed so that I will have access. That will be the first thing at that time!
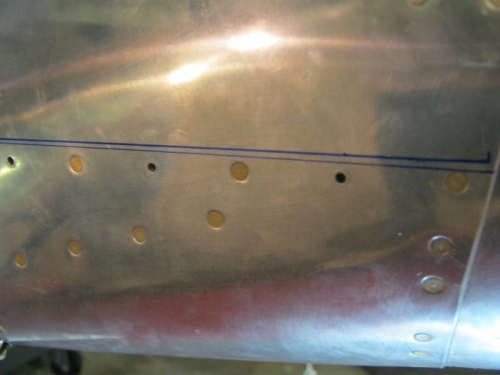
Started on the flap fairing left side. With flap fully retracted, I positioned the fairing on the top flap skin and marked the upper edge of fairing on the fuselage. The holes for the forward part of the fairing are prepunched in the fuse already and must be match drilled from inside the cockpit through the fairing. So I needed to make sure that I have proper edge distance first. The bottom line in pic is where that fairing sits flush on the flap but the aft most hole will not have the required 3/16 edge distance. The second upp
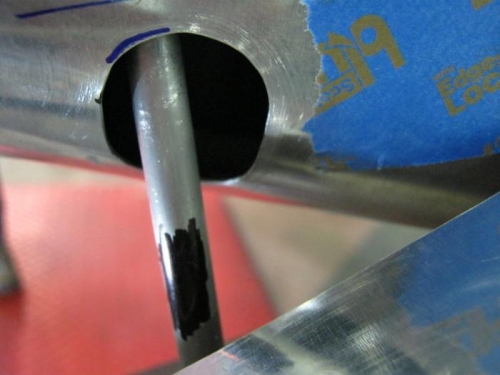
Rt side flap rod hole contacts the rod.
Rt side hole widened. Use a sharpie to color rod and then run the flap to check for scrapes
Position flap faring on flap and mark top edge. Bottom is flush fit. Top is proper edge distance. Hmmm