Brief Description: Bellcrank, pushtube, rudder install and stops
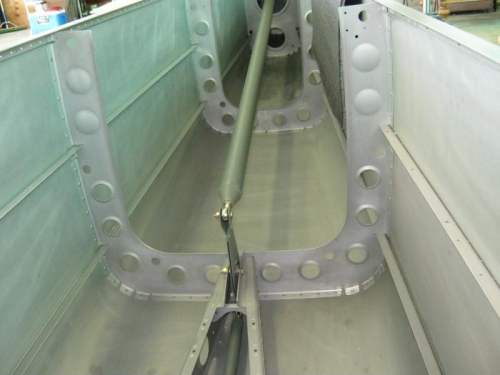
1. Attached the bellcrank assembly and elevator pushrods to control column belcrank and elevator horns. 2. Adjusted the pushrod rodend bearing until the control sticks were perpendicular to the upper longerons. Then tightened the jam nuts
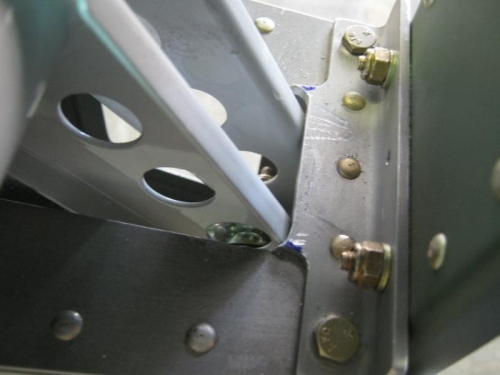
3.Filed, sanded with dremel, and filed some more on the elevator up control stop until I got to the accepted range called out in chapter 15. 25 to 30 degrees up deflection is acceptable and I got to aprox 27 degrees before calling it quits. This took me a long time to file that stop down and check deflection over and over. I'm not sure why Van's installed that stop with rivits and then why they left so much material to remove.
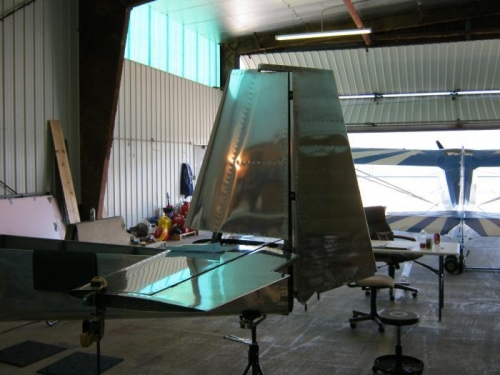
4. Installed the 3 rod end bearings on the rudder spar and adjusted to heights called out on dwg. I hung the rudder and installed the three AN-3 bolts. The swing is good but might require a bit of tweeking on lower bearing to get perfect. I do that later. I measured the deflection with a simple protractor and got 33 degrees wmen measured at the bottom of rudder near rudder stops and get 31 degrees if measured at top near counter balance. Range is 30 to 35 degrees. I plan to leave it alone incase I need to adjust the bearings in or out when I install the bottom fiberglas cap.
5. Started working on the flap motor install. Drilled the necessary holes in the bracket and bulkhead. Also final drilled/reamed the clevis brackets in the flap bracket weldment Drilled a tiny hole in the end of the motor push rod for safety wire as shown on dwg 79 waiting to mount it while i try some of that napa 7020 primer in tthat area and to make sure it doesnt react with the wash primer thats already applied by vans.
6.Prepared the rudder cable supports by cleaning up the edges and then drilling, countersinking and instaling the 2 platenuts with flush rivits. Inserted the plastic bushings. Will install in fuse tomorrow.
Note: I need to adjust the rudder slightly and I need to clean up and round of the corners on the elevator stop. I will probably wait until I r
Elevator push tubes installed and bellcrank installed
Filed away on the elevator up stop to get with in the 25 to 30 degree deflection limits.