Brief Description: Mounting Horizontal stabilizer to fuselage 1
!. Shopping for a 8-32 tap and some vice clamps. also picked up something to hold up the tail that I can adjust up and down.
2. Tap the previously drilled #30 holes in the throttle cable anchor to 8-32.
3. Primered the cable anchor
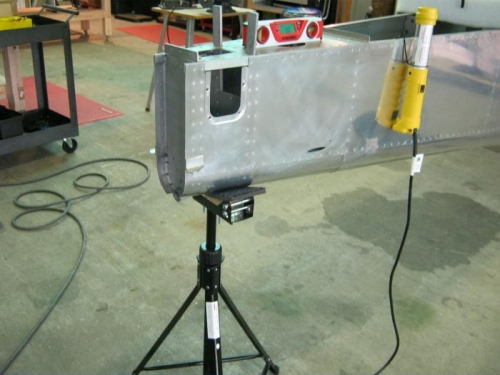
4. Moved the fuselage in the hangar where the tail will be easier to access, Put the fuse on jack stands, assembled tail stand and put tail on it.
5. With my handy dandy electronic level, I leveled the fuseelage laterly with the levels on the center bulkhead where wings attach. When that was level, I leveled the fuselage longitudinally with levels on afat deck. A series of back and forth on this then went on until I was satisfied. Way too long but wanted to be as accurate as I could be.
6. Separated the shim pieces for the HS with hack saw and then polished up the edges on grinder and scotch brite wheel.
7. * Placed my Horizontal stabilizer on the fuselage as per plans and clamped. Centered the rear spar on the fuselage with careful measurement. This too was triple checked. When satisfied, I clamped tightly in place.
8. Placed a shim under the front spar splice angle and lined up to the edge of upper longeron on left and right side. Clamped this tightly as well. Also marked the placement with a sharpie to make sure it does not move while being drilled.
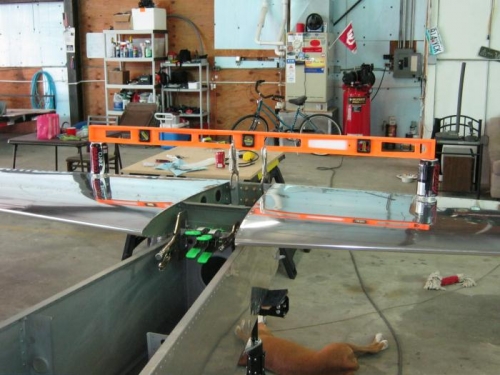
8b. Placed a coke can on top surface of HS left and right sides in same location and at the rib/rear spar webb intersection. Placed a 4 foot level on the two cans to check if the stabilizer is level With the fuselage. I placed my shorter digital electronic level on top of the longer bubble level for cross check. I was happy to see level. I have only a 0.1 degree differance from fuselage measuremen to HS stabilizer measurement. I will most likely leave well enough alone here.
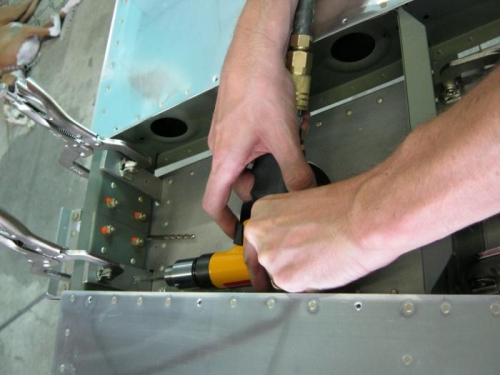
9. ** Drilled #30 size the horizontal stabilizer rear spar 2 locations left and right** Used the horizontal attachment bars predrilled holes as a guide.
10. Measured the distance from aft outboard corners of HS to a forward position on
Adjustable tail stand from harbor freight. Tail is level here.
My high tech blocks with level to check if HS is level with fuselage
Drilling the rear HS spar through the HS mounting bars