Brief Description: Fuselage rotisserie fabrication and mounting
I wasnt going to log this time but then decided it realy doesnt matter. Getting the plane built does.
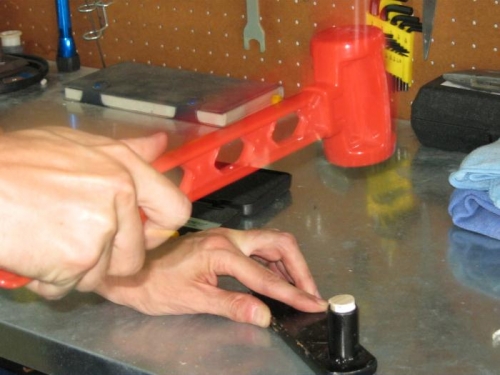
Today I spent time at hardware store looking for required hardware to mount this. I ended up with a 4 foot piece of 1 inch angle iron, some fender wasers, some bolts and nuts and a wooden dowel.
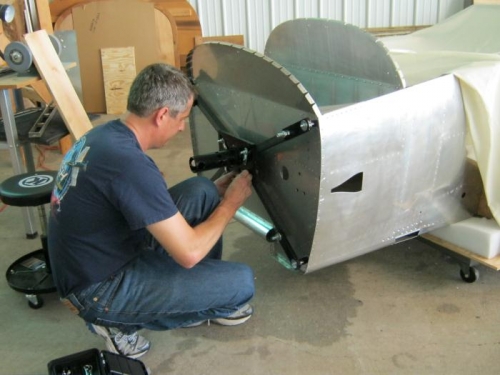
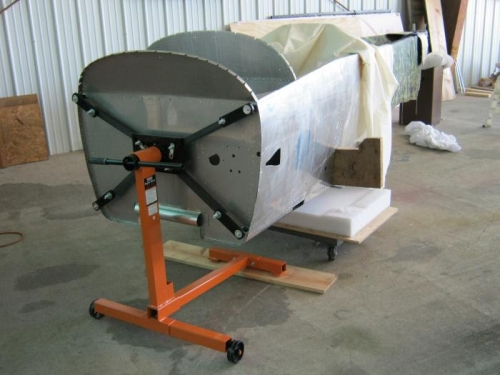
I cut the steel in to four 12" lengths with hack saw and drilled a 1/2" hole on the end of each one. I chose this size only because thats the aprox size of the bolts that came with the engine stand mounting plate arms. I also drilled a smaller hole on the other ends to attach to the mounting plate. I cut four 2 inch pieces of wooden dowel and pounded them into the arms stand offs. Drilled the dowel centers to 3/16 inch because thats the size of the predrilled holes in the fuelage firewall. I would prefer to drill those holes to 1/4 inch minimum but I need to research some first. Meanwhile these will hold. Assembled the spider webb by attaching the 12 inch piece of steel inbetween the arm and plate and then centering trying to keep the arms lined up with the steel. Attached the whole thing to those tiny bolts in the corners and then raised up the fuse and pushed the stand in. Done! The tail is currently resting on a speaker and pillow until I get another saw horse.
It rotates easily and also has a locking pin to keep it one position to work on.