Brief Description: Wing tip lights and lens cover install
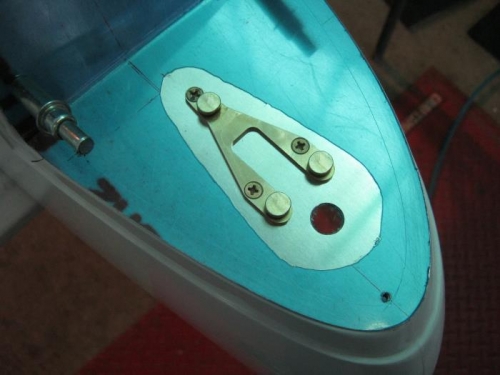
I first cut an oversized piece of 020 alum sheet and bent on brake. This was done earier and I might have posted already. I then marked where I wanted some screws to be that will secure it. I marked the positions and punched and drilled #40. Later I will drill #27 for #6 ss screws.
I then spent too much time trying to decide how I wanted the position lights oriented. I used the 1:1 install diagram for he aeroleds, cut out and moved around until I thought it looked good and even. I then traced the outline and then used solder iron to cut a line in the protective plastic and removed the area that will be covered with the light. I plan to leave the rest until all is complete so that it stays nice and shiny.
I held the reflective piece in position and and match drilled my holes into the fiberglss and clecoed. With it in place, I traced along the edge with fine sharpie. Removed and cut along the line and then sanded. This took several iterations on each piece back and forth until it looked even along the edge and that it wouldnt rub against lens cover later.
I then placed the template again with backing clecoed on tips and centerpunched the lighting bracket holes. Drilled them to #27.
Drilled a 7/16 hole fwd for the lighting wire bundle to fit thru. Be careful here, mine required drilling about 1/4 inch more forward than the template.
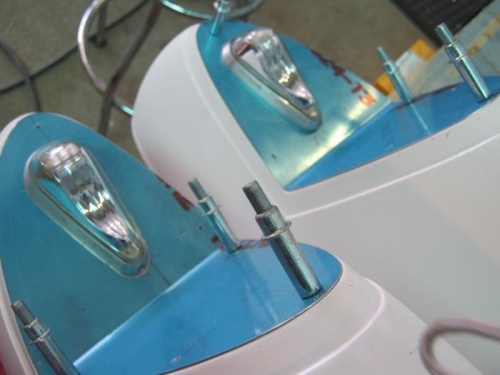
With all drilled, I removed and deburred everything and then reinstalled and put the brackets in with #6 screws and nyloc nuts. Slid the lights inposition on the bracket.
This was repeated for the other side
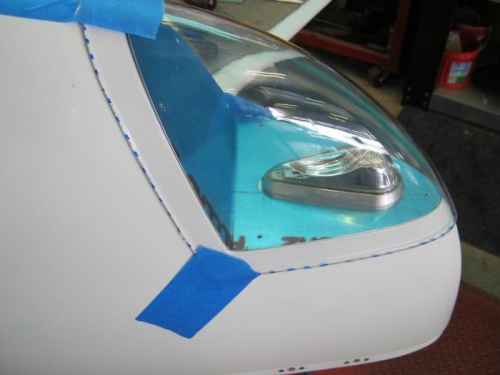
Moved on to the lens covers. It comes as one big piece. I cut in half and trimmed of the flange. Set in position and marked along the edge of the lap joint and then trimmed with dremel. Note: This is some thin plastic lens and melts easy with dremel. I found out by the time I got to the other lens that it cuts easily with a pair of metal snips. Much easier!!
Used belt sander and eased the cuts to the line. I then taped in place and will later make fresh cut
020 alum cut and trimmed and light bracket drilled in place
Reflective backs and brackets and lights installed