Sanded some more on the rudder top and bottom caps to get the fiberglass transition to metal line smoothed out. I then sprayed several coats of sanding primer and unmasked and removed electrical tape.
Removed the Rod ends making note of how far in I had them screwed in and then made measurements of distance to end of plate nut plus 2 threads. I then realized I did not have the top one in far enough and so this required installing further in as the plans had stated in the first place. The middle and bttom rod ends I screwed in more than what pland called for but not so much as to cause interference with anything. Doing this helps align the gap between the VS and ruffer top cap better. Not perfect, but improved. After several on and off itterations, I tightened the jam nuts up tight and applied torque seal on each. Installed the rudder with the bolts but leaving the nuts off for now.
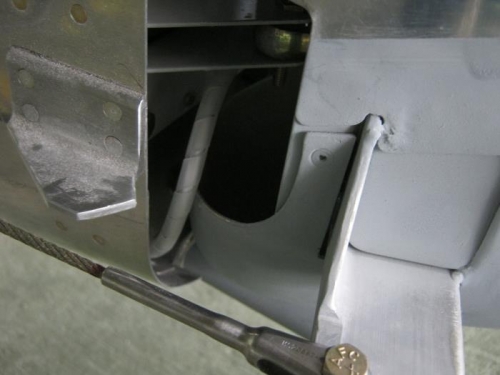
Installed the tail light/strobe on the bottom cap but messed up the bottom screw and I dont have another one that fits. I ran the wire bundle with previously installed connectors and attached to those from the fuse and zip tied the bundle and wrapped in self seal tape and then tucked deep into the bottom cap. I need to secure the wire from the fuse with an adel clamp to the bottom attach vracket to keep it from binding up with a swinging rudder.
Looked at my degree of deflection and cant decide on best way to measure. Ill try again tomorrow when its cooler and more refrehed.
Electrics supply to rudder lights. Needs an adel clamp