
|

|
|
|
Bill & Brendas RV-8 QB
|
Date: 3-8-2014
|
Number of Hours: 7.00
|
Manual Reference:
|
Brief Description: baffles trim to upper cowl-3 and some rework items
|
|
Started off the day by fitting and trimming in the 3/8 gap for the #3 cylinder baffle and the # 2 cylinder baffle. Was bit easier than the same baffles on left side because you can reach them thru the oil door. Also much easier to view the gap for verification.
Moved on to getting the front baffles cut to the 3/8 inch gap using the paperclip method again. Pic below shows how much the clips moved down after cowl was installed and then removed. I was surprised because I though I had it much closer by hand yesterday. Got it trimmed up and then removed and cleaned up the cuts on scotch brite wheel. Didnt get a photo.
The clips fabricated earlier were drilled to the joggle area between the front and aft baffles and then dimpled for flush rivits from the inbd sides.
Then I spent a good hour or more refabricating a new angle support for the right intake ramp to fwd right baffle. The last one was held ramp edge too close for both the baffle fabric and the conical gussett to transition under the aft edge of the cowl intake lip. This required the drilling out of aprx 9 rivits, Flatten the dimples, Make another angle, Fit to the baffle and ramp with the necessary clearence, Drill, debure dimple, Rivit, install cowl, check fit. Looks better and should work as required now.
***NOTE: The stiffners that go on the rear cylinder baffles have oval shape cutout in them that matches the cut out in the baffle. These holes are for access to the ignition wires. and have hardware provided to seal the hole until access is needed. HOWEVER... the instructions dont mention anyting about enlarging the stiffner cut out enough for tinnerman washer to fit inside it. I realized this today and ofcourse I had already rivited the stiffners in place. So< then got to carefully drill out the rvits, Enlarge the cutout in the stiffner to the tinnerman washer, deburr, and rivit back on. I turned the rivits around this time and put the smooth head side on the engine side so that the ignition wires wont rub against a shop end. Probably doesnt m
|
|
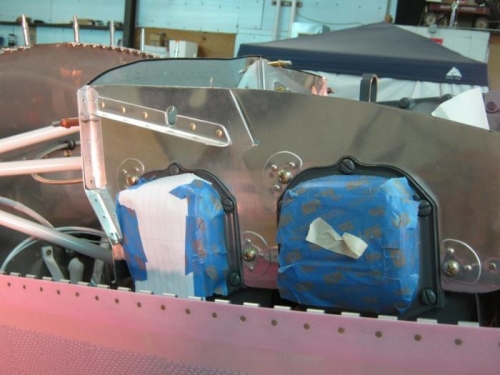
Right side baffles cut down to fit with 3/8 inch gap to cowl
|
|
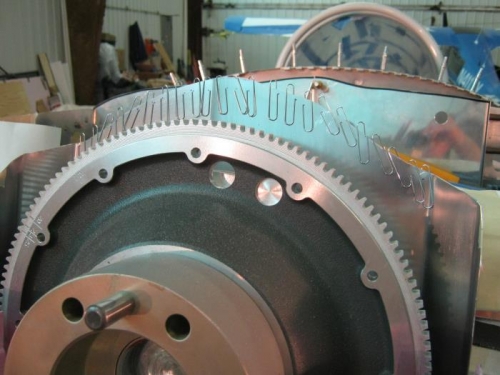
Front baffles cut down to 3/8 inch gap to cowl
|
|
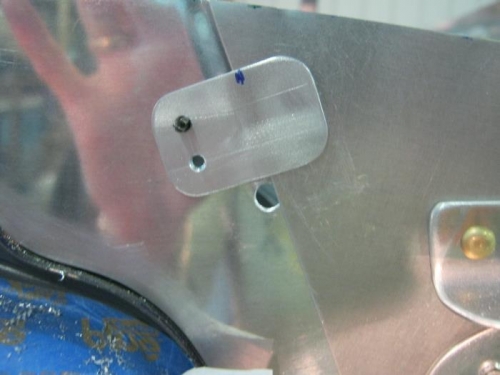
Side baffle clips drilled and dimpled
|
|
|
|
|
|
|
|
|
Copyright © 2001-2024 Matronics. All Rights Reserved.
|