1. Installed a tie down block to top of transponder tray to hold some wie secure. I scrape adhesive pad off back and add amazing goop automotive.
2. Soldered a extra lead on to the ground of the ASI and then shrink tube and secure with tie wrap. connectorized opposite end with terminal and labeled and added to the dimmer post.
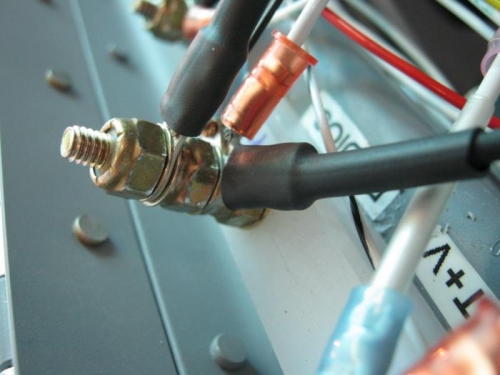
3. Adjusted and tightened all the wires down on the 7 posts of terminal block. Some had to be done several times because Id get another wire ready and then need to secure it too. Things are filling up!
4. Drilled an additional grounding post and added the screw and nut like the others.
5. Mark and drill for the second dimmer pot. I had both locations drilled once but needed the second hole for a circuit breaker. Wasnt sure I had room but after looking closer, I decided to pot next to the other one. I think it will be ok. This for the cabin lights dimmer
6. Wired the dimmer pot as I had done the first one yesterday
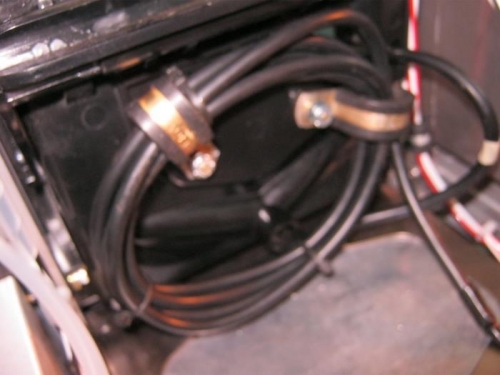
7. I installed the GPS power bundle to the back of the gps mount. Just coiled it up and attached with two adel clamps. Gps end has enough slack and runs thru mount to attach to the removable unit. The other end has a inline fuse for the power lead which I connectorized and attached to the radio terminal. Also connectorized the ground and attached it. The other wires are for serial in and out. That comes later but I know I will be attaching the out to the auto pilot and to the engine monitor.
8. Untied the trutrack bundle and re wound it and tie wrapped a bit nicer and more out of the way.
One of 7 terminal posts example. 3 to 4 terminals on bottom, then a nut then 3 to 4 more!
Second dimmer pot drilled in new location and then installed and wired
GPS wire harness wound up neatly and secured to back of mount and then wired up