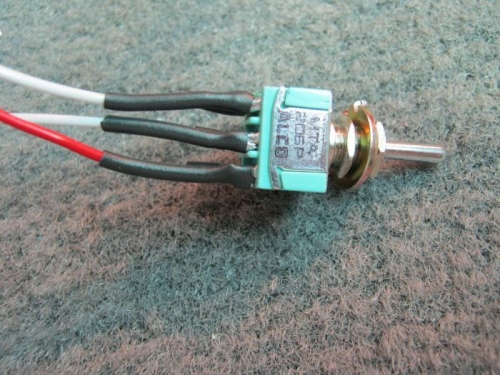
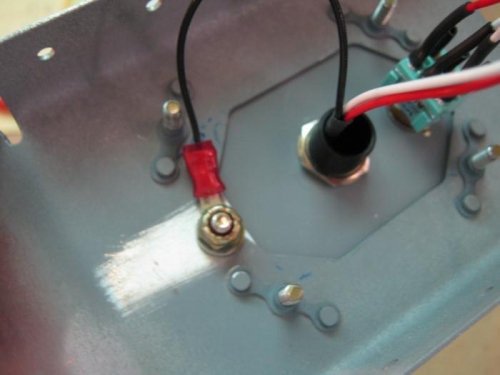
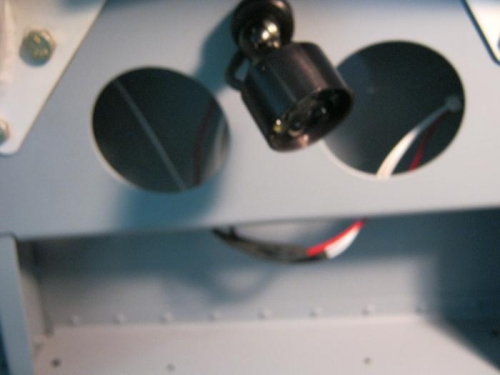
This probably should have been an hour job but......Im slow and need to think things through as I go. Wired the front and rear map lights to their own micro switches. I had purchased double pole double throw but only needed single pole. Went with these anyway and just covered the unused lugs with shrink tube. I wired the red and whie wires from the light to outer lugs of micro switch with solder and then a length of 22 awg wire from the center power in lug that will go forward to the front map light and then forward to power source. I covered these lugs with shrink tube. The black ground wires was cut short and i installed a tounge terminal. Decided to install a #4 screw that is hidden by the access plate. I countersunk and installed the screw and ground wire and then installed the access plate. The power wire travels along the static line tube to the rear light and is connected with a hand shake type connector. The rear light is connected with d-sub pins and covered with shrink tube. Ground wire is local to a nearby AN3 bolt. Wires will be tucked away for nicer look. I hooked power lead to batter and a ground lead from aeframe to battery for operational check. They work as planned. I can choose either red or white light on either fixture
I spent some more time looking at and making a plan on wireing up the two 12 volt aux plugs. Didnt get very far though