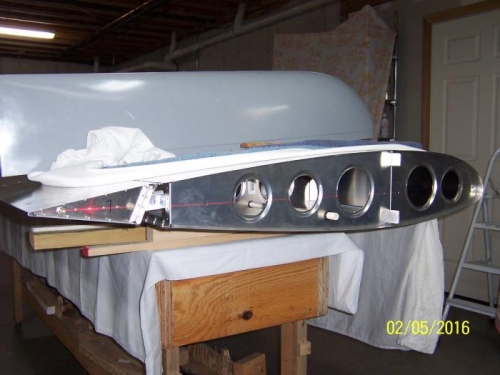
Preparation work for assembly of the right wing tip began today. To start the process, the wing was aligned to horizontal with a self leveling laser sighted to the rib tooling holes, then shimmed to hold the level orientation. The aileron tooling holes were then aligned to the laser and locked in position with wood blocks at the aileron joiner.
With the aileron aligned, the tip was temporarily set in position and measurements taken to determine how much of the inner flange needed to be cut from the wing tip. After trimming and sanding the flange, the lower flange was further sanded to allow the rear edge of the wing tip to align with the rear edge of the aileron. I was pleasantly surprised how and well the tip aligned with little effort.
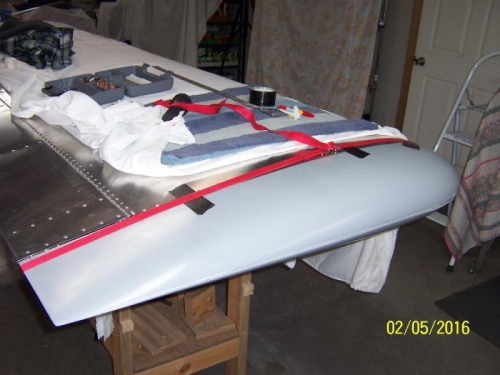
After verifying that the aileron was still correctly aligned, rivet hole locations were marked and drilled to #40. A strap was used to force the wingtip firmly into the leading edge skin, and the tip was taped into final position. Holes were transfer drilled into the wingtip flange clecoed in position, then alignment was checked again.
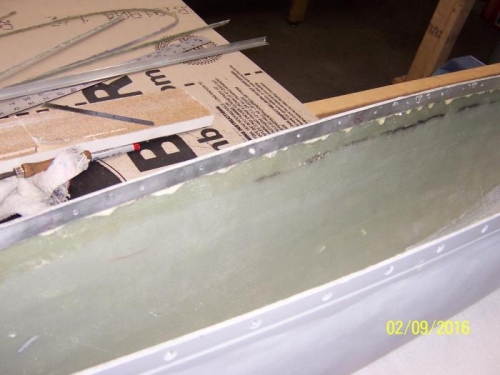
Since it is not good practice to rivet directly to fiberglass, 0.020 thick aluminum strips were cut and glued to the inside of the wingtip flange and allowed to cure.