
|

|
|
|
Johns Web Site
|
Date: 7-15-2015
|
Number of Hours: 5.00
|
Manual Reference:
|
Brief Description: Prepping the Forward Fuselage for Final Attachment
|
|
While the bottom aft skin was off, I decided to permanently attach the four horizontal stabilizer attach brackets. This was a simple task, but took a little time because the hardware needed to be accessed from both the top and bottom simultaneously, and I’m not as limber as I as I once was.
The aft fuselage was separated from the forward section and the bottom and side intersecting surfaces and rivet holes were deburred and cleaned up. Some scuffed up primer was touched up, and the rivet holes on both sections were dimpled. The right side of the elevator push rod cover was clecoed in position in the aft section because it is almost impossible to install it without damage after the two fuselage halves are married.
The bottom surface of the forward fuselage was then dimpled using the “Clamp/Dimpler” that is discussed in the June 13, 2015 log entry under in the Tooling category. This tool worked well where there was no interfering structure behind the hole being dimpled.
For the areas where this tool did not work, I resorted to the tools in Image #2, a standard center punch, and a hammer. The third item is a small piece of aluminum coupon with a dimpled hole in the center. This is used as a gauge to tell if the dimple is the correct depth. This technique worked OK, but is not nearly as consistent or as quick as the “Clamp/Dimpler” tool. It normally takes two firm strikes with the hammer, but it is difficult to hit it consistently, so a slow iterative process is used with frequent checking of progress with the coupon.
|
|
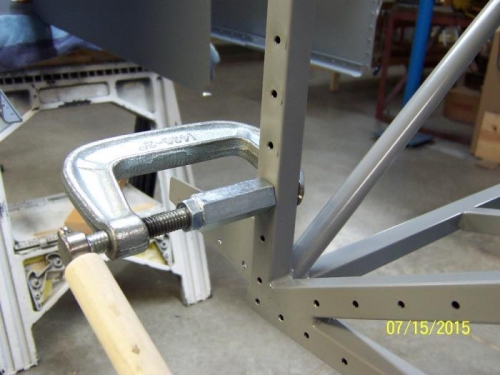
Clamp/Dimpler in Action
|
|
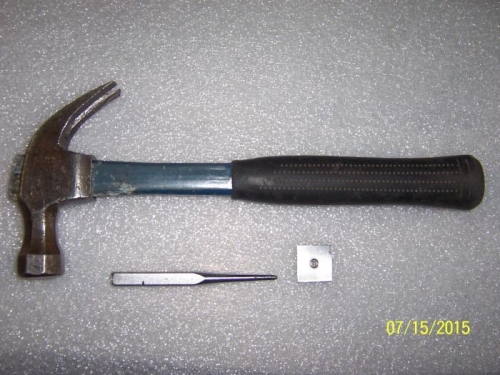
Dimpling Tools for Obstructed Areas.
|
|
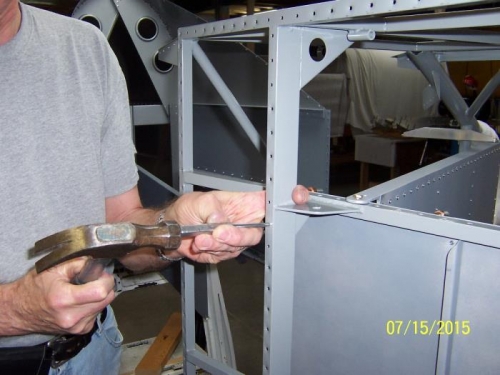
Obstructed Area Dimpling.
|
|
|
|
|
|
|
|
|
Copyright © 2001-2024 Matronics. All Rights Reserved.
|