Brief Description: Countersinking for tank attach nut plates
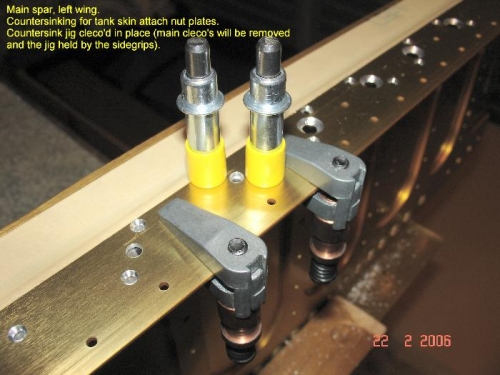
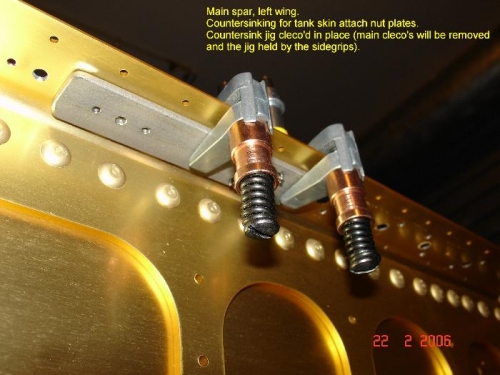
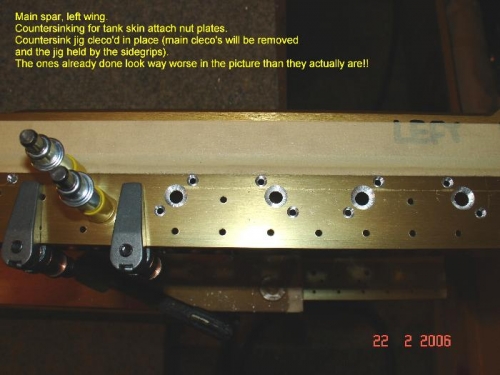
This took longer than expected!! Thought I might at least get a complete side of nutplates done. Drilled rivet holes to #40 and deburred then countersunk. Drilled #19 for #8 screws and deburred. Then used my previously made countersink jig to start countersinking but only got a few done. Process consists of cleco'ing the jig in place using the #40 holes - this centres the #30 hole in the jig in the #19 hole in the spar. Then I clamp the jig in place using 1" cleco side grips and remove the 3/32 clecos. I can now countersink the #19 hole using a #30 countersink bit in the microstop countersink cage. I used a scrap piece of .032" Al sheet to create a 'dimpled skin' guage and worked the depth of the countersink until the skin lies flat against the spar. The first couple ran a little deep since I used the guage with the jig still in place. The skin stopped against the #30 hole in the jig and I ran a little too deep, though not too much. On the third hole I kept removing and replacing the jig until it was all 'just right'. Got one more hole countersunk and then had to stop for the evening. Will get back into it tomorrow night, but I'm in no rush...
Countersink jig in place - top view
Countersink jig in place - bottom view
The first four holes - they look worse than they are!